
SpeedTree to Blender | Anime Tree Workflow
It's the most expensive Tree Generator, but is it worth it?

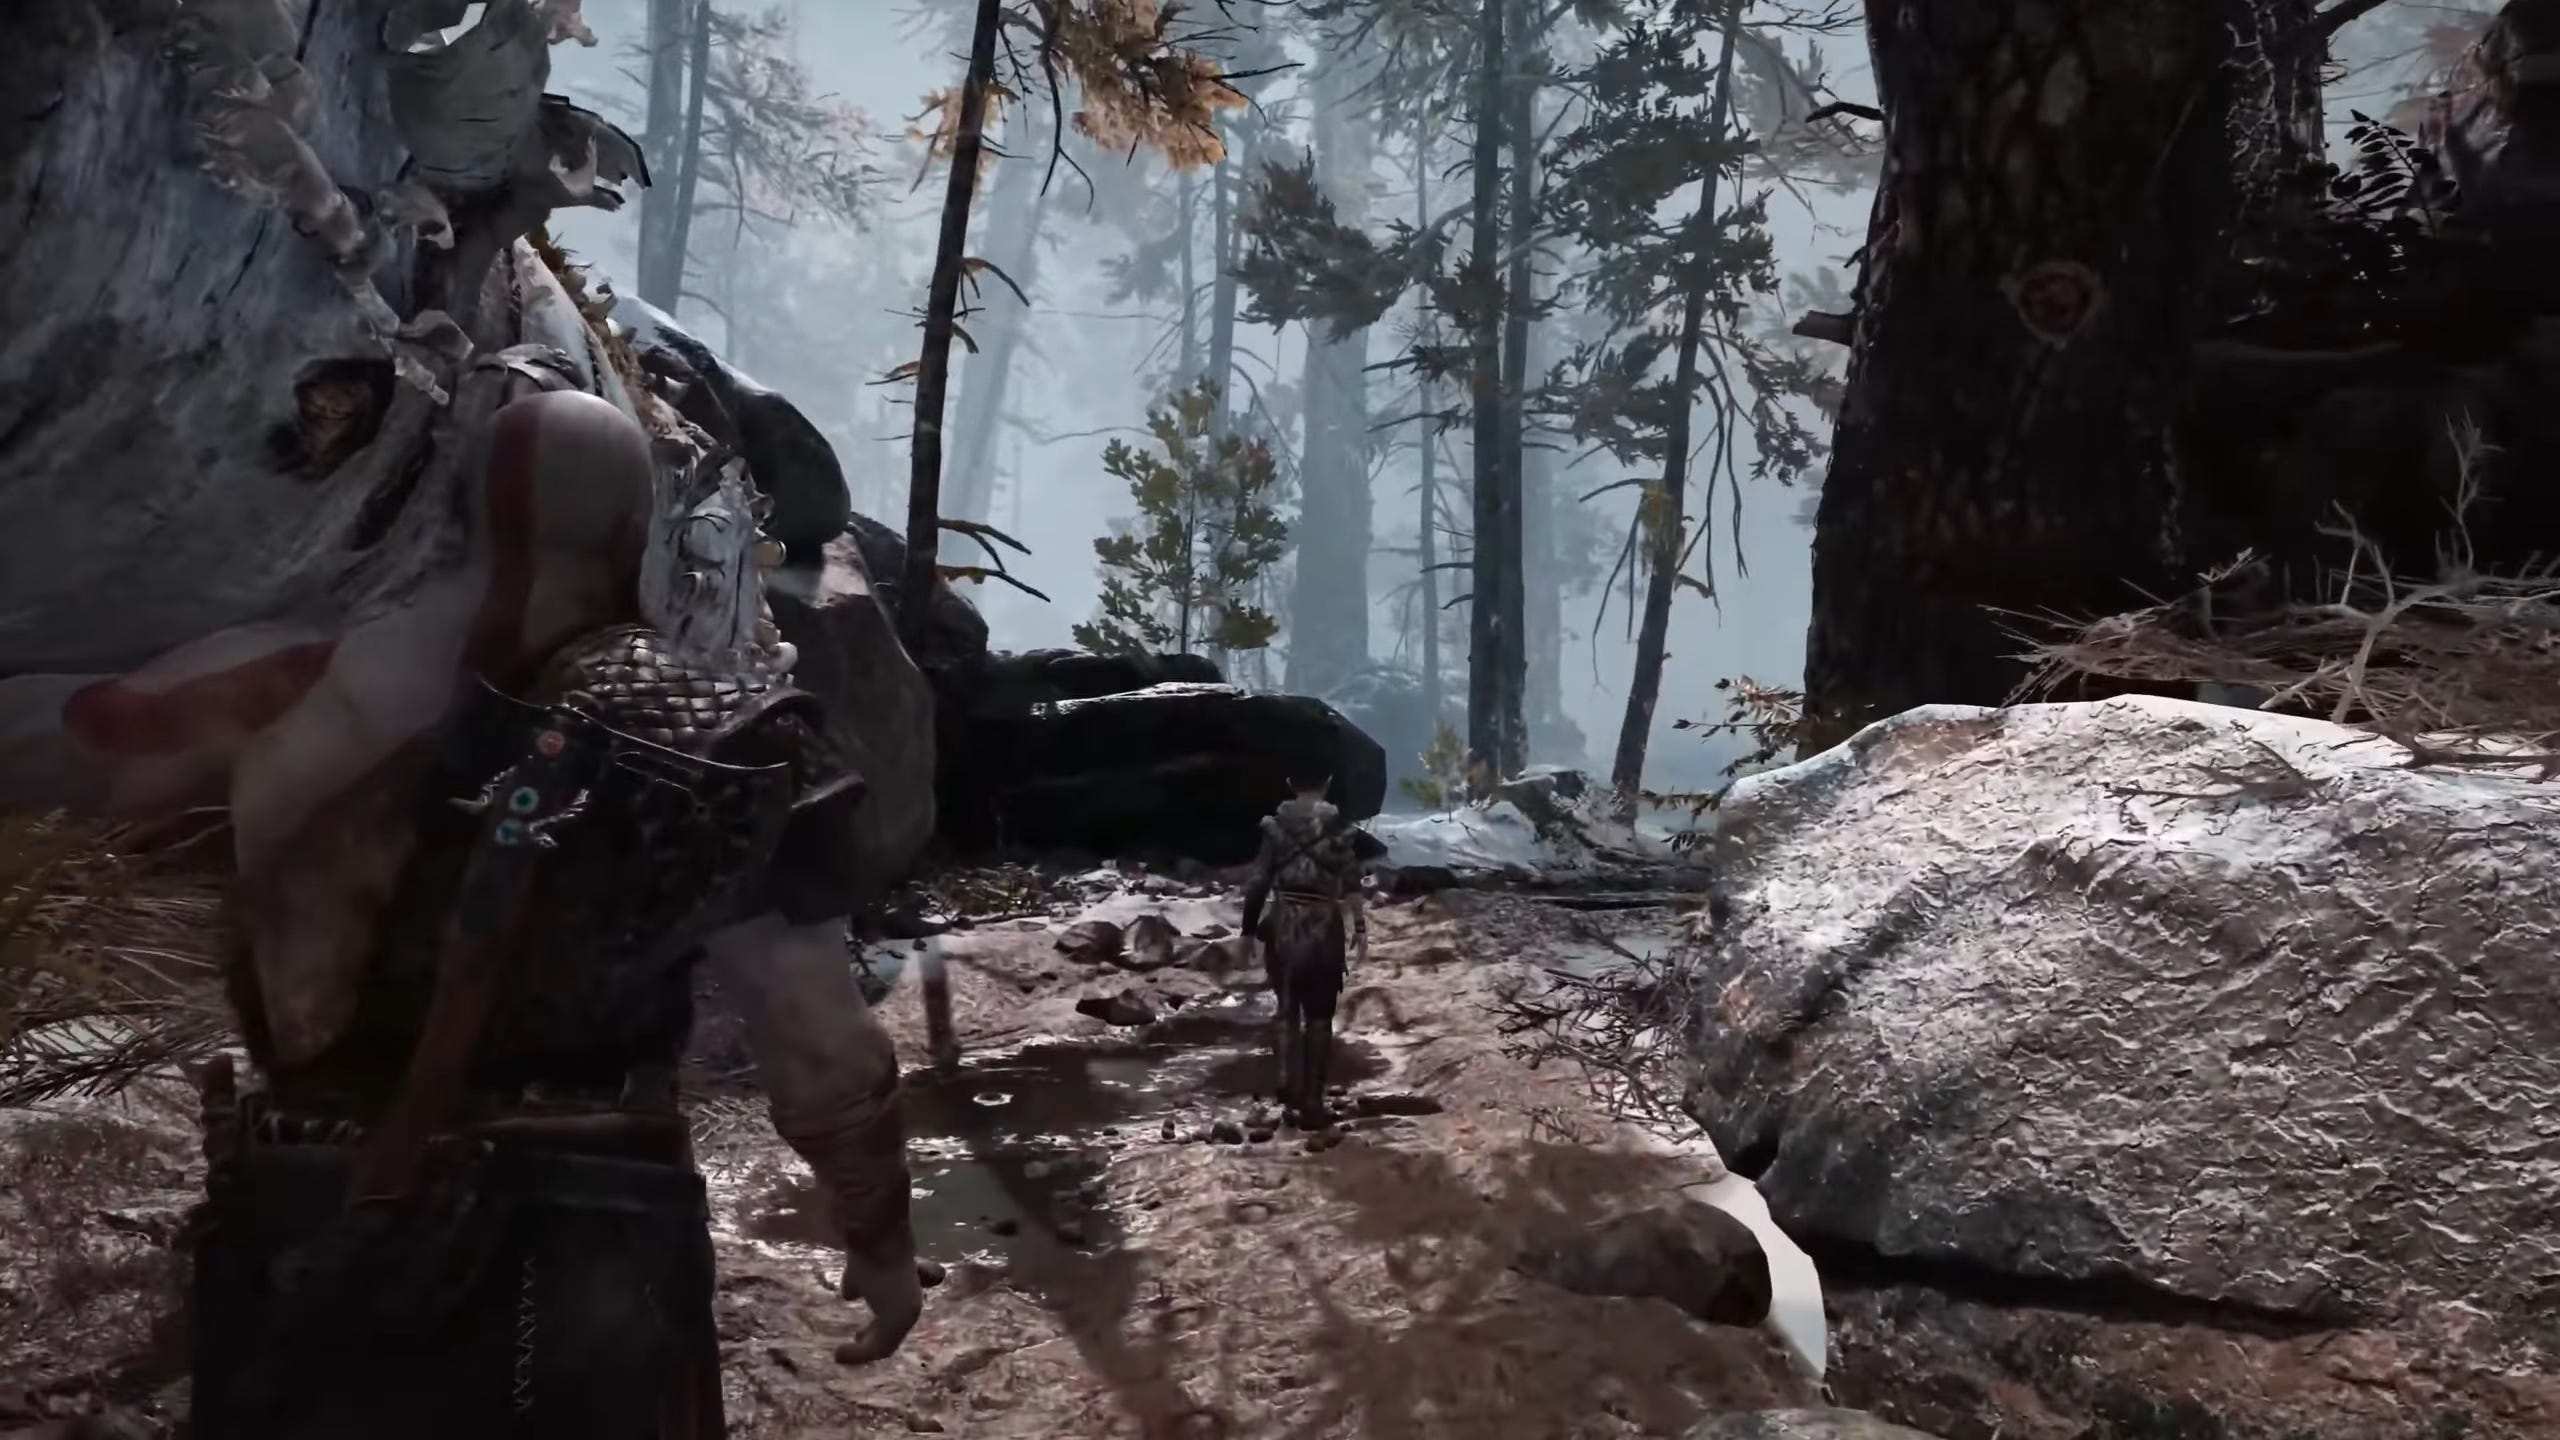
Today I'm going to try using SpeedTree. Speed tree is a piece of software not many people know about. I'll be spending a bit of time creating a tree using SpeedTree, customizing it as much as I can. After that, I'll bring it into Blender, set up the shader, then render the tree in anime style. I'll also use one of SpeedTree's built-in sample trees and show how to reuse it to get similar results, saving you time and effort. So, first, what is SpeedTree? It's a tool used by a lot of AAA studios, specifically made for creating vegetation. Many games use SpeedTree without people realizing it. God of War, Days Gone, The Witcher, Assassin's Creed, and many more. It's also heavily used in film and TV due to its high quality and robust physics support.
This isn't my first time using SpeedTree. I worked with it years ago while at a studio. This might come as a bit of disappointing news, but SpeedTree isn't free. In fact, it runs on a subscription model at $19 per month. However, I'll show you how to use the 10-day trial version, which gives you full access to all features. There's also a learning edition. I'll get into that part later. Let's talk about what we'll do today. First, create a custom tree from scratch in SpeedTree using the trial version. This won't be a full speed tree deep dive tutorial. Otherwise, we'd be here for hours, so I'll link some of the tutorials I learned from in the description if you want to explore further. We'll then bring the tree to Blender, set up lighting and shaders, and do a quick render. I'll also show you some fast tricks and tips along the way and finally help answer the question. Should you use SpeedTree for your own projects?
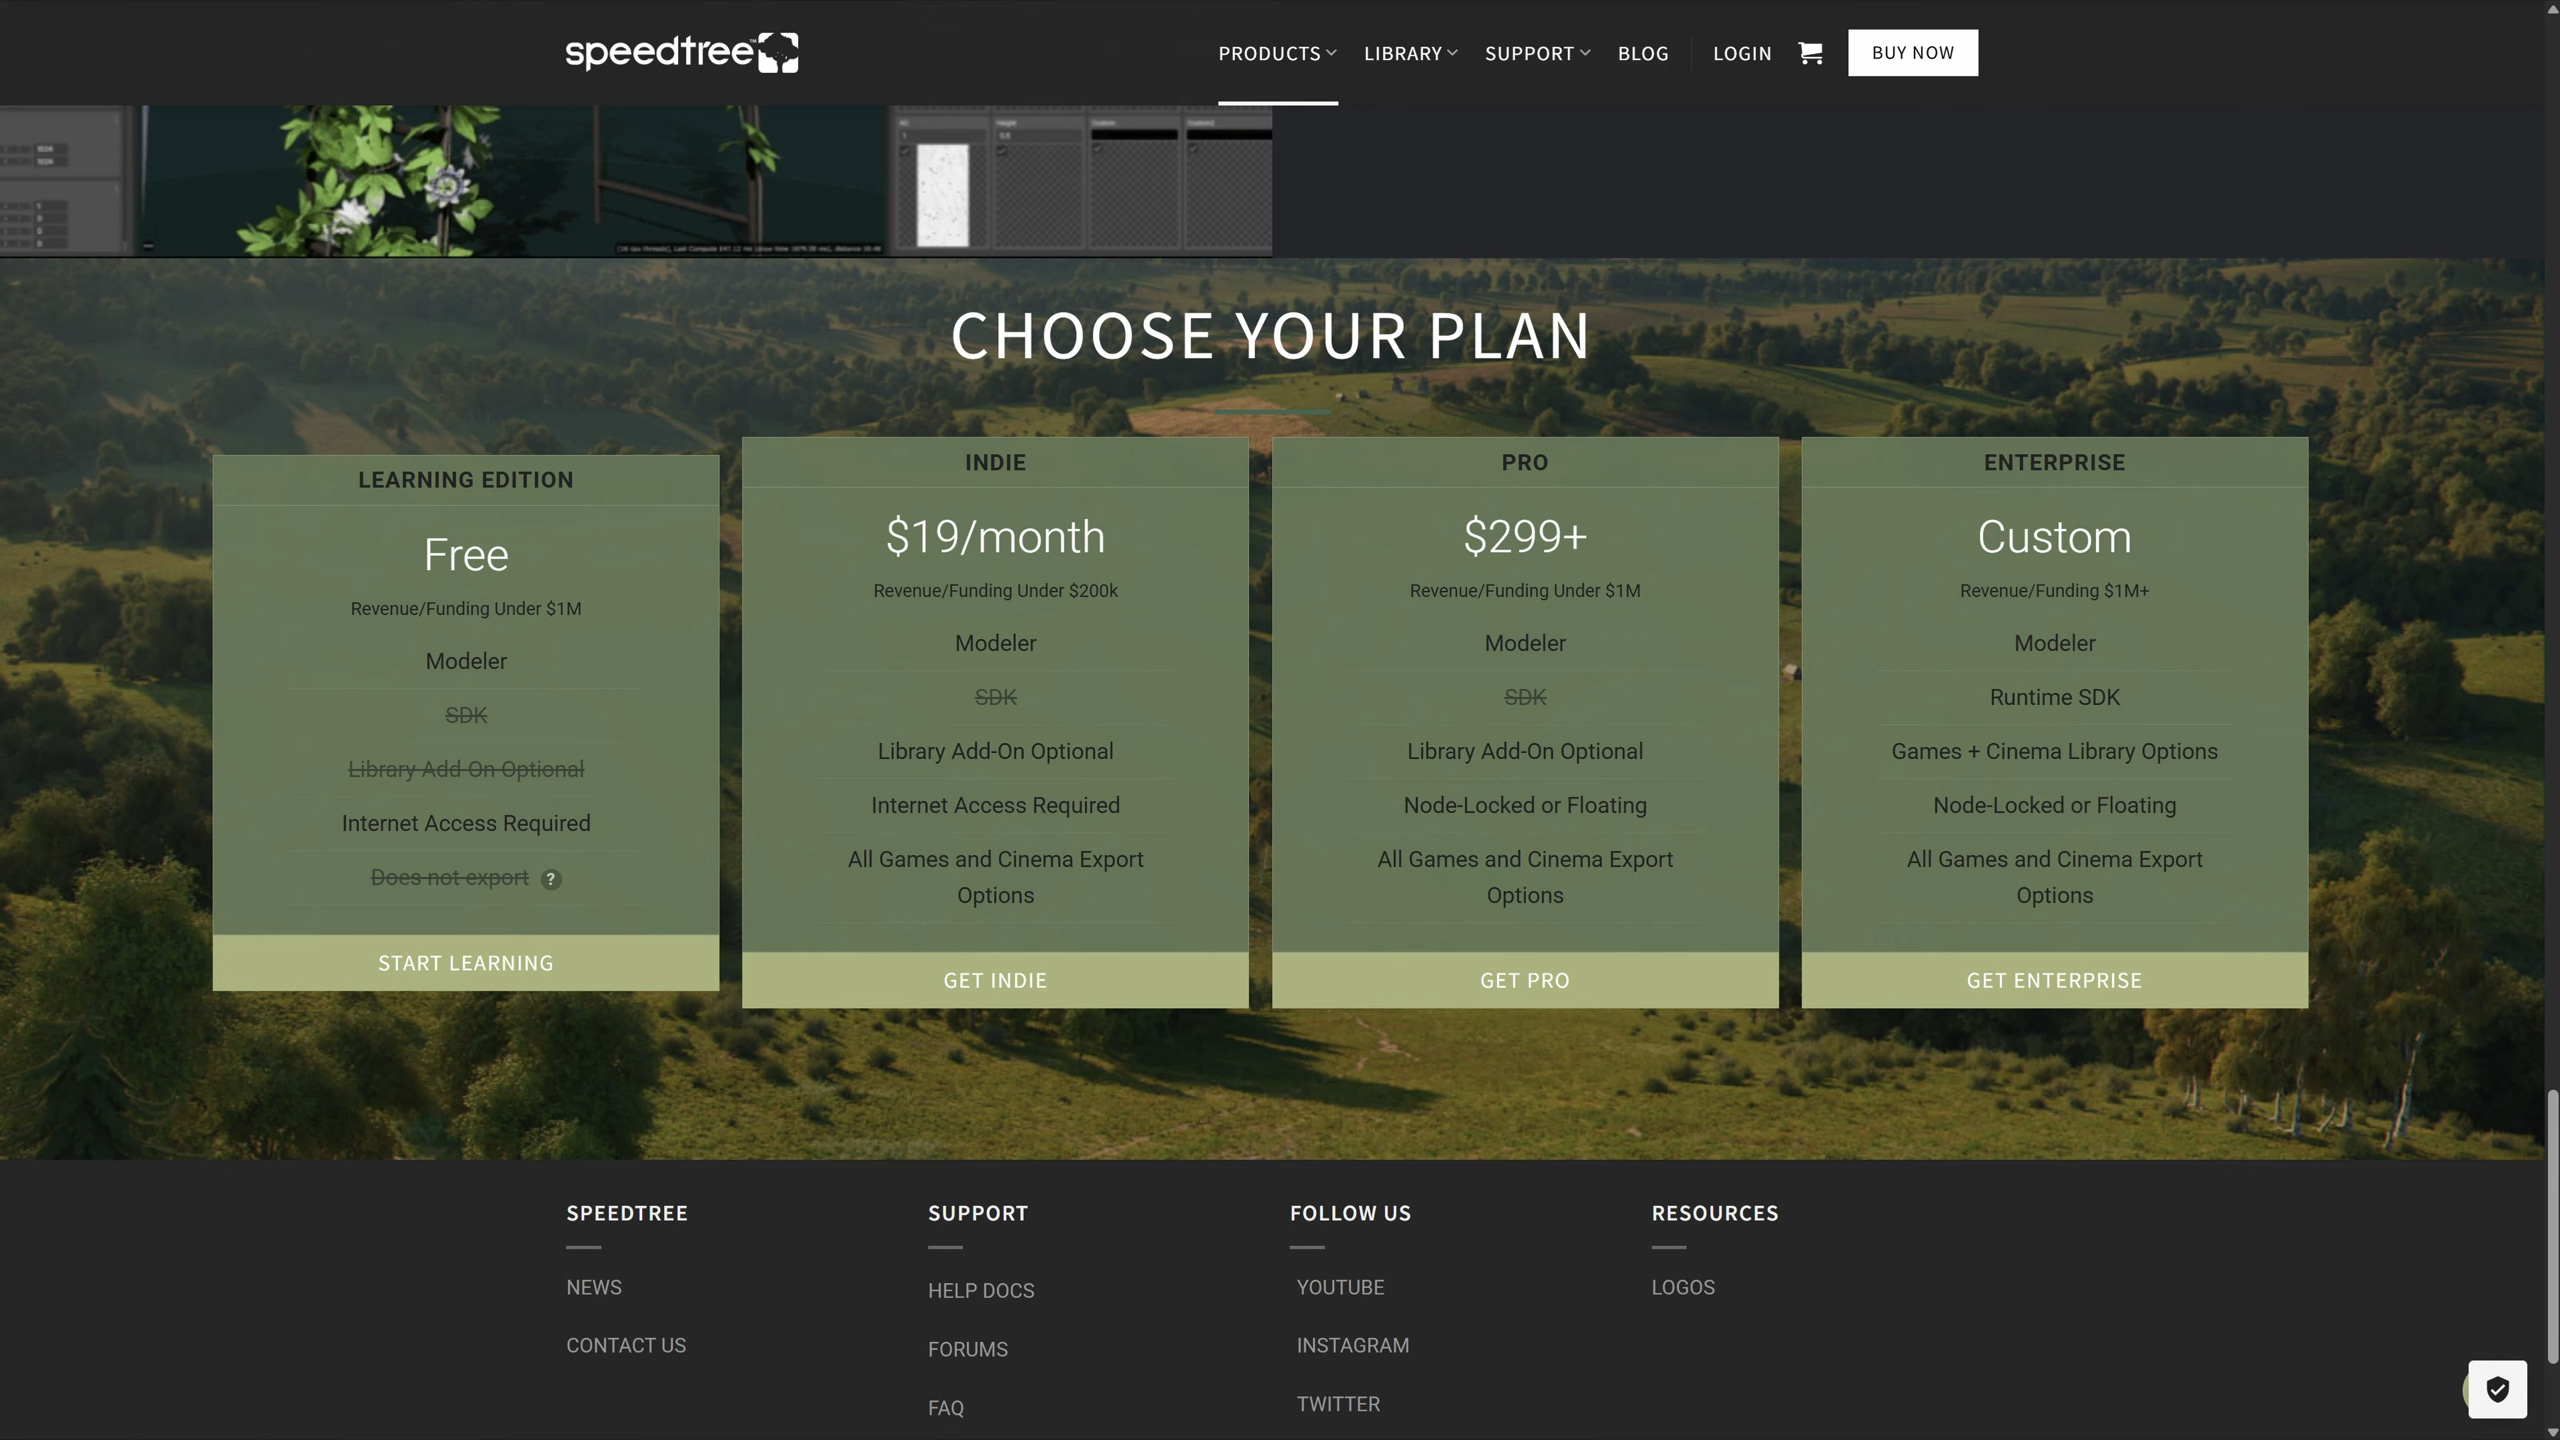
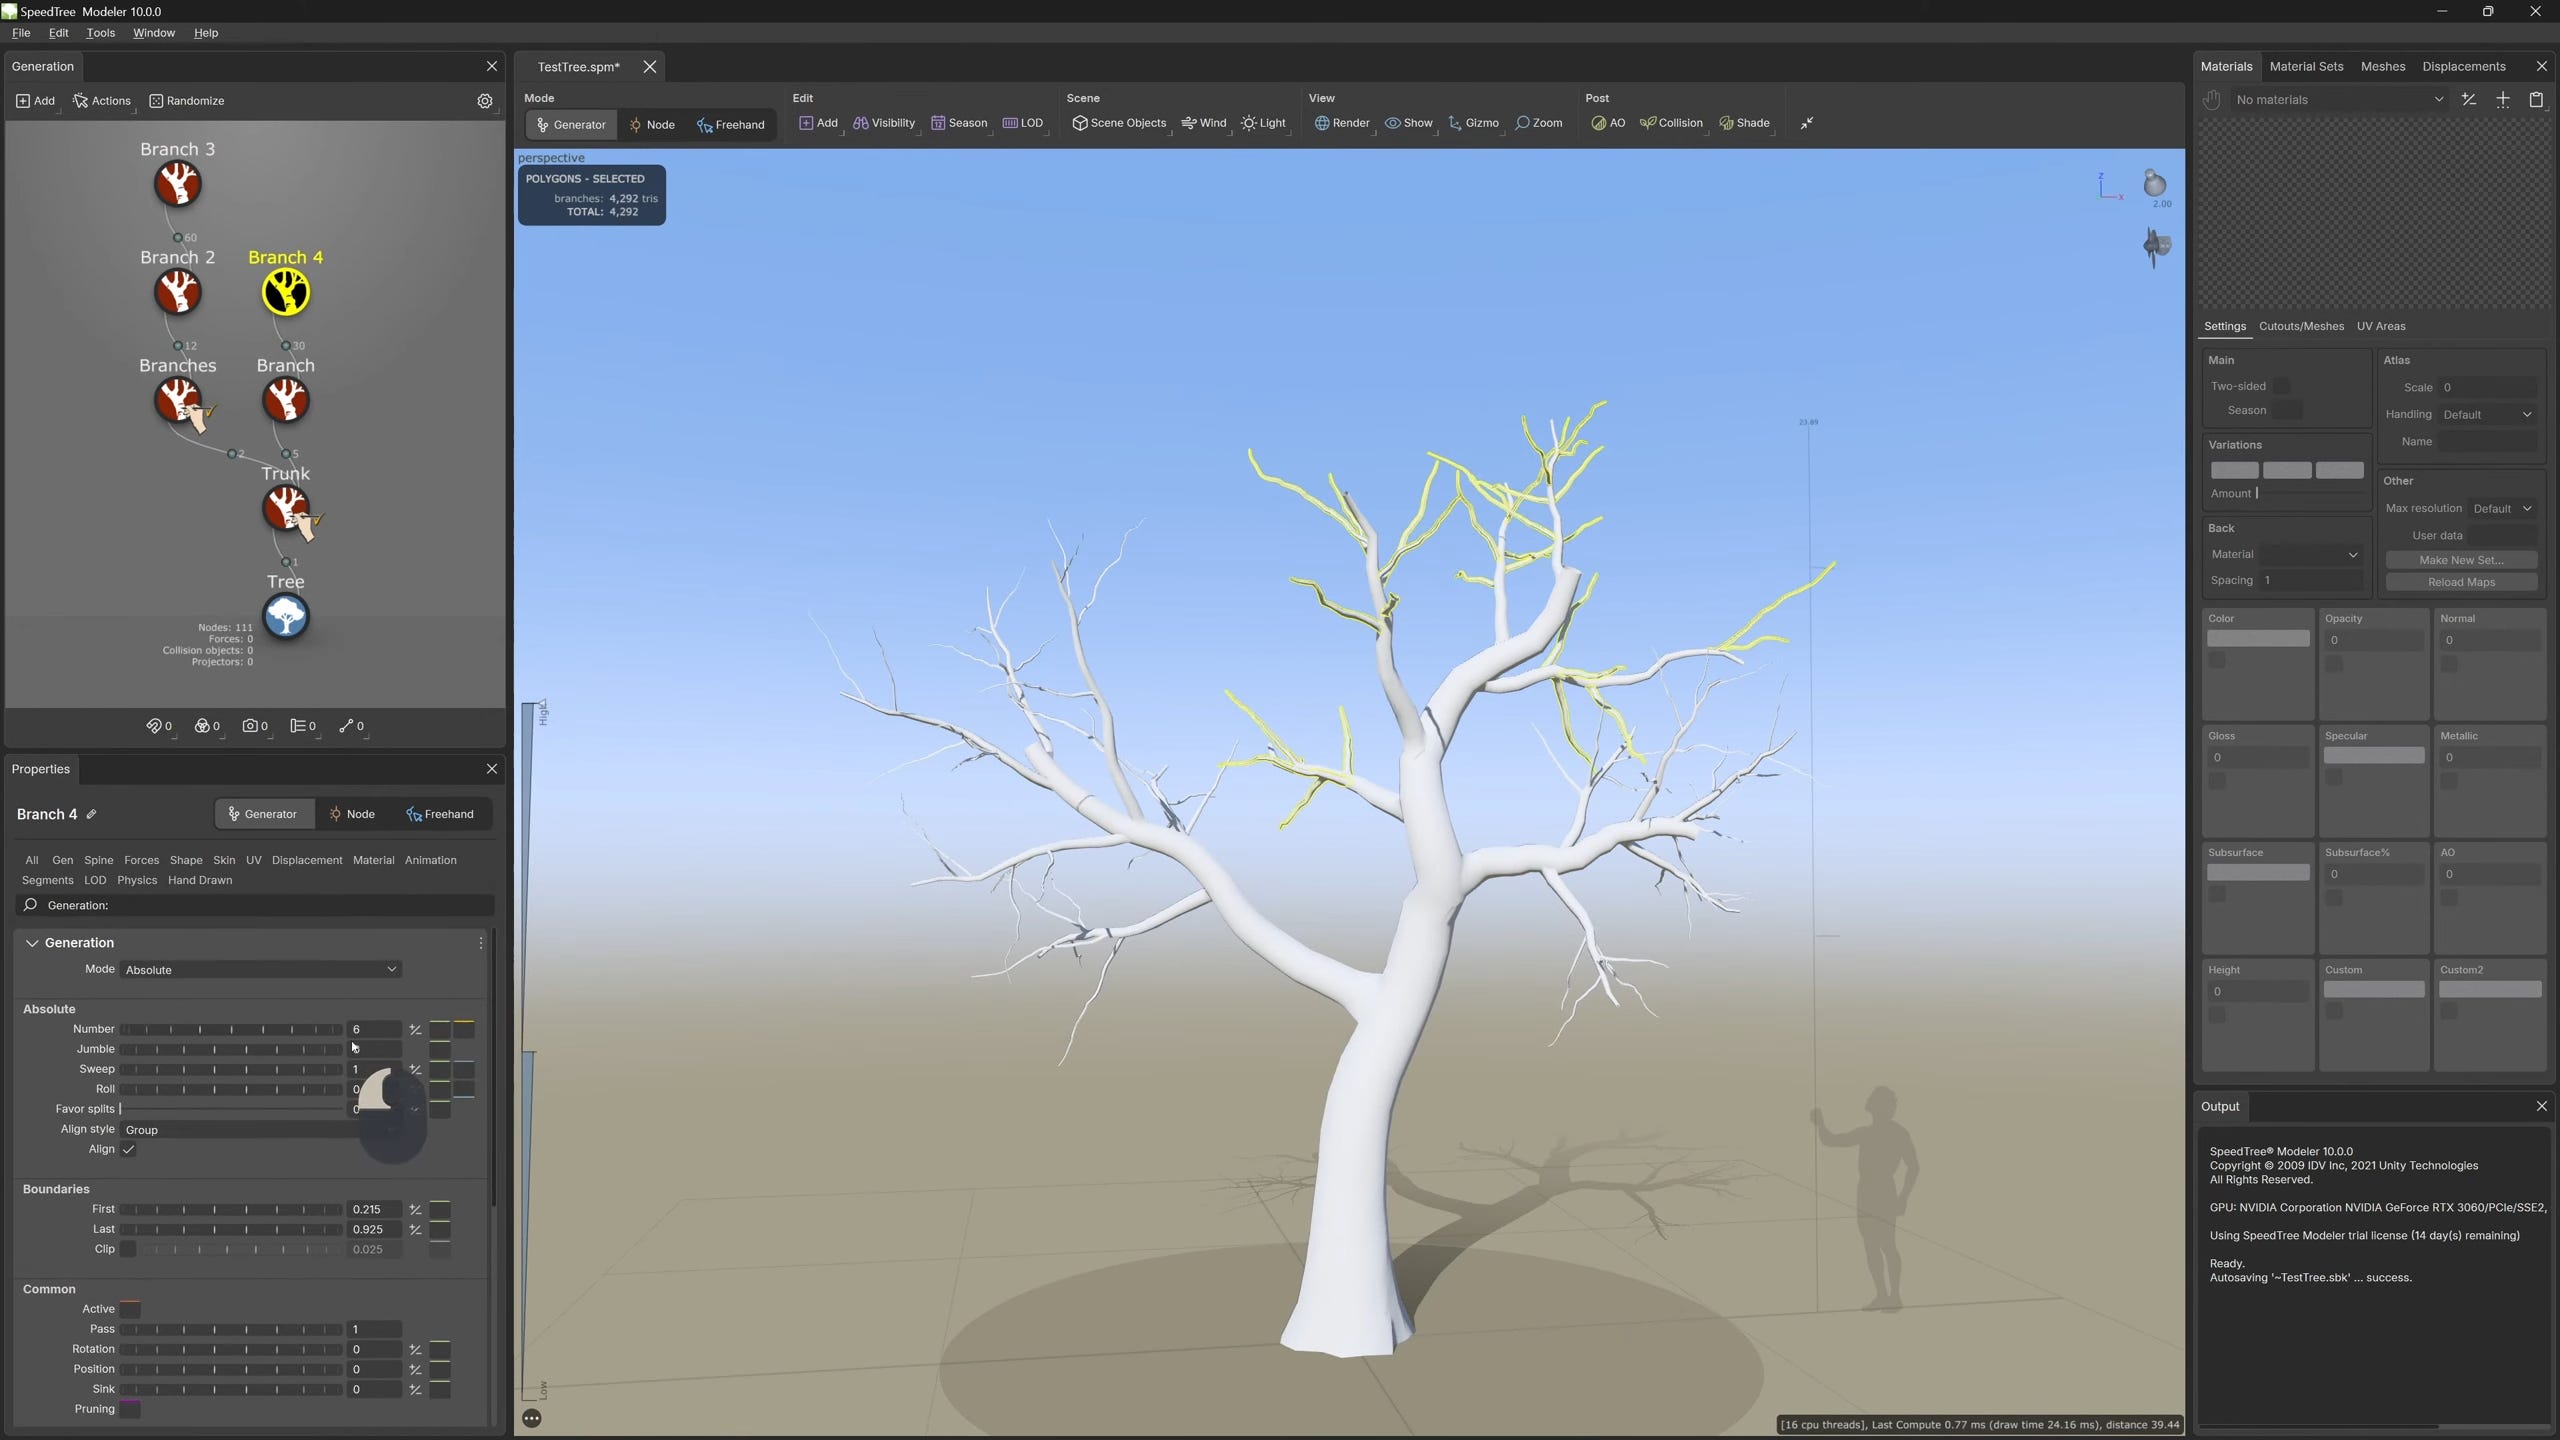
In order to try SpeedTree for free, just visit the SpeedTree website, register an account, and download the evaluation version. You'll get a 10-day trial. However, I recommend starting with the learning edition, which is unlimited but doesn't allow exporting. Once you're familiar with all the buttons and settings, you can activate the 10-day trial to get full export access. This way, you won't feel pressured to learn everything before the trial runs out. When you install it and open it up, there are already highquality sample trees available, complete with wind settings. You can press eight on your keyboard to preview wind animation. And to me, it's one of SpeedTree's best features. These samples are professional grade and ready to be used or modified for your film or movie for games you might want optimized quite a bit. Or simply use the SpeedTree assets designed for game engines. Now, let's create a tree in Speed Tree. Here's a quick overview. First, build the tree structure. This includes roots, trunk, branches, twigs, and leaves. I combine procedural tools from the generation system with manual tweaks to get the shape I want. Next, apply basic materials. Lastly, add wind animation. First, let's build a tree from scratch. As mentioned earlier, this won't be a step-by-step tutorial, but I'll walk you through the core features and the principles behind them. To start, I'll create the trunk using the freehand tool, which lets you draw the trunk in any shape you want. To use the freehand tool, choose the function that you want, then hold space, then click on the viewport. I'll also use it to add the main branches. This tool gives me full control over the base shape, making it highly customizable from the start.
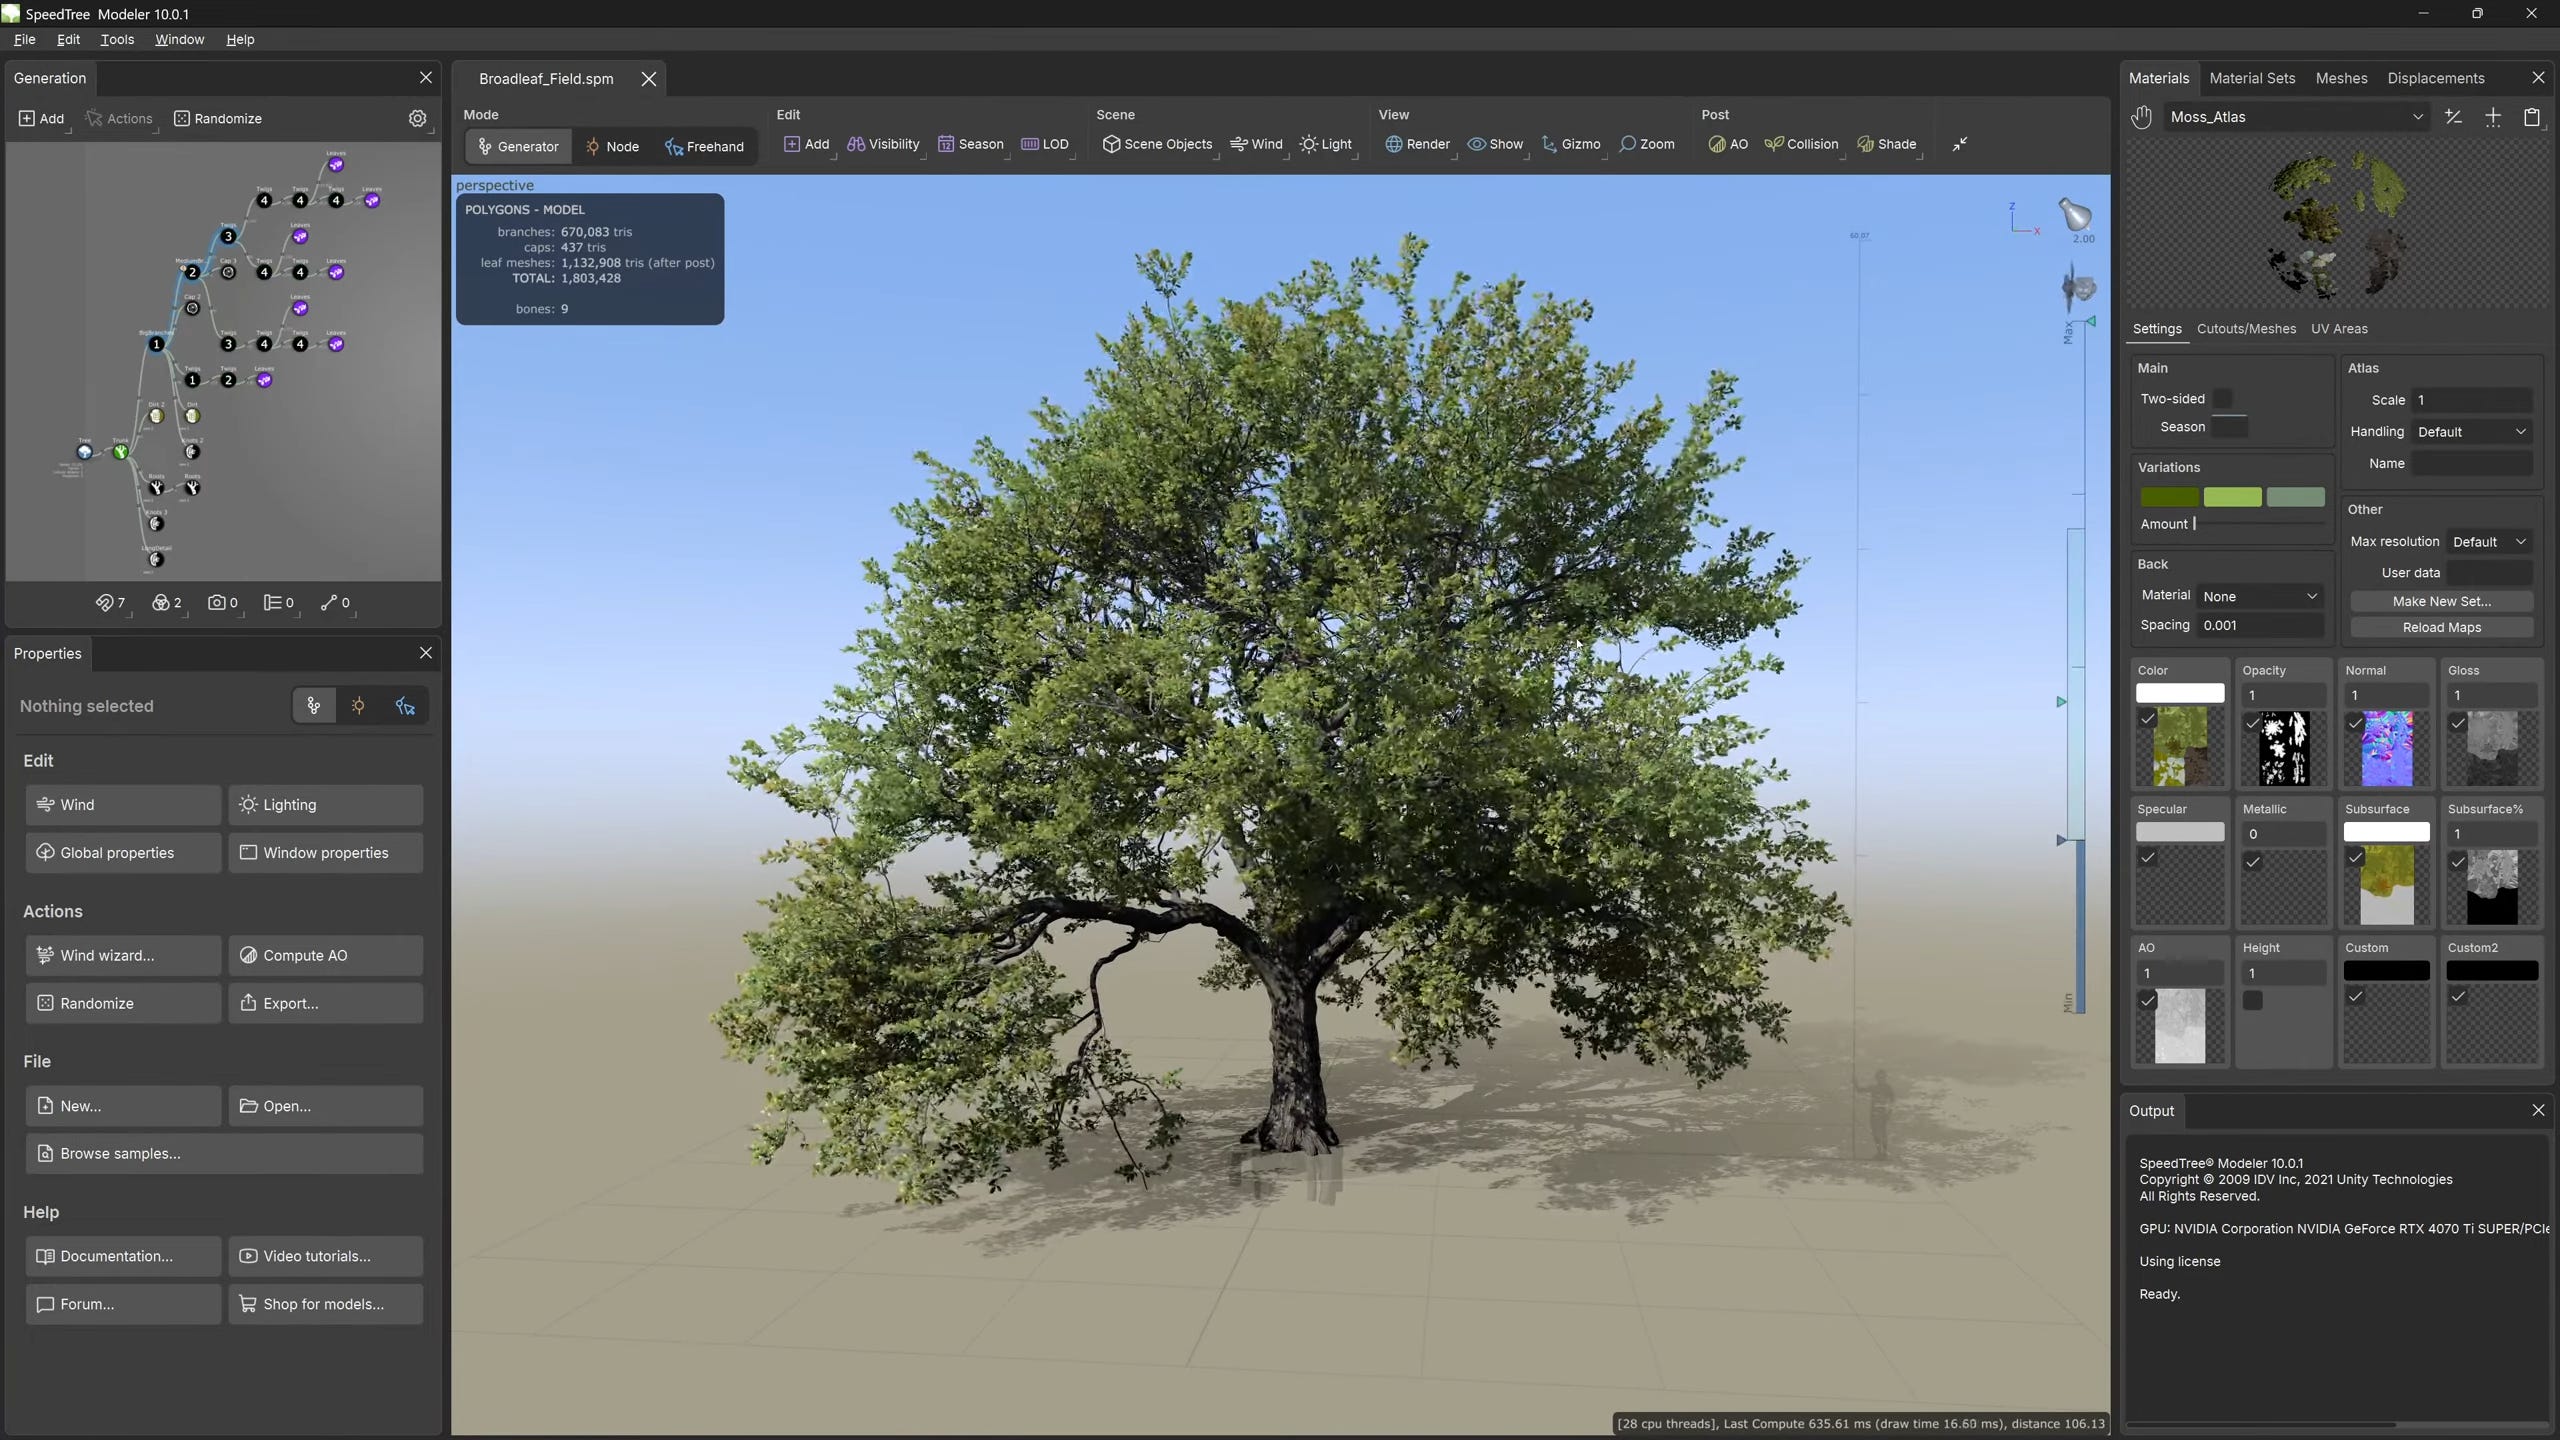
For everything else, I'll switch to the generation system, which is Speed Tree's node-based workflow. It allows you to procedurally build the tree from trunk to branches to leaves by connecting different nodes together. You can also adjust the number of branches as well as their arrangement and angles. On top of that, you have the option to manually tweak each part of the tree using the onscreen controls. By combining procedural generation with manual adjustments, you can quickly build your tree while still having full control over the final look. I'll simply repeat the same process from this point onward.
Before adding leaves, I'll generate small twigs first using the same note system to create a more natural growth pattern. This helps the foliage take on a fluffier, fuller shape, something that's especially desirable if you're going for an anime style tree. Speed tree also offers a variety of leaf growing presets for you to choose from. Like before, you can adjust the number of leaves, their size, and how they're angled. You can even customize how the leaves are arranged to mimic realworld growth patterns.
At this stage, the tree is mostly done. I'll use the same node system to make some final procedural or manual tweaks, adjusting the trunk, branch placement, and foliage shape to match the look I want. This is where I finalize the overall silhouette.
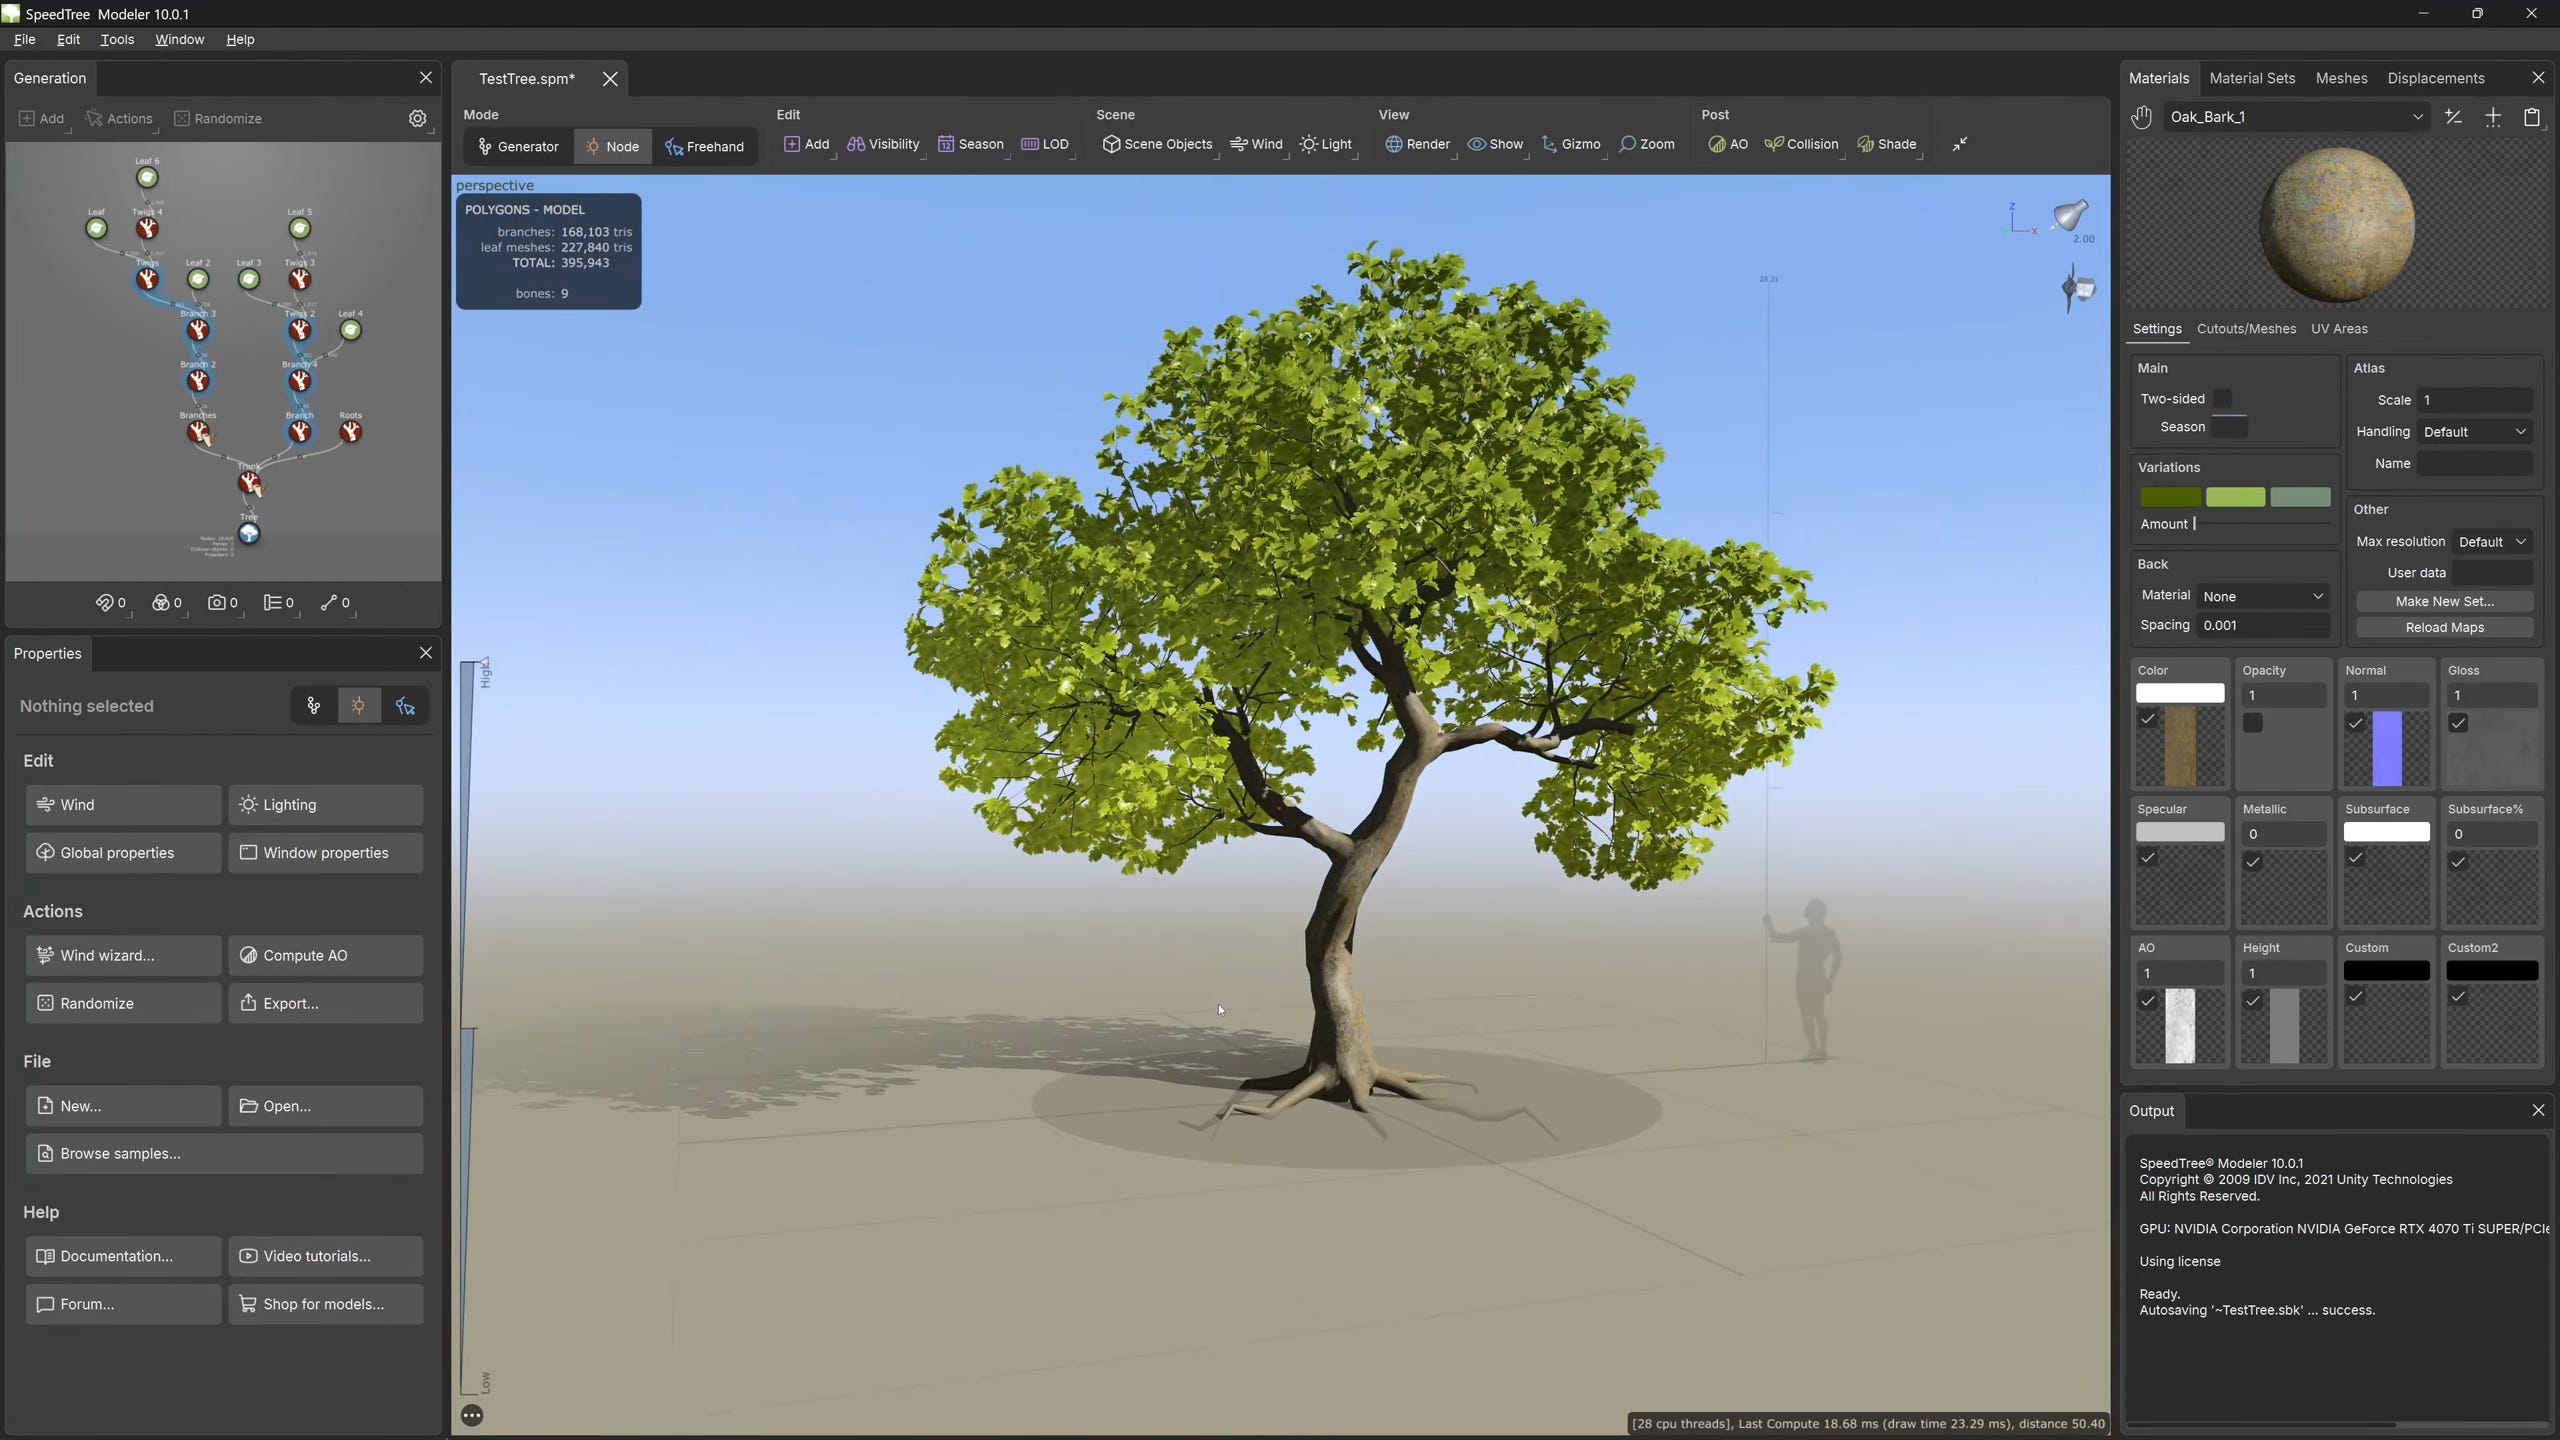
Once the tree's basic shape is finalized, it's time to apply materials to each part. SpeedTree includes a built-in texture library, but you can also use your own custom textures if you prefer. Keep in mind that materials in SpeedTree are mainly for visual reference while working inside the software. Since the goal of this tutorial is to create an anime style tree in Blender, I'll only reuse the textures from SpeedTree. The shaders in Blender will be created entirely from scratch. Next, it also allows you to generate custom leaf meshes. One important reminder, make sure to enable double-sided in this window. This workflow relies heavily on leaf vertex normal, so having two separate mesh sides is crucial. I'll tweak the leaf shape and apply materials directly within SpeedTree. And you can control the mesh resolution depending on how close your camera will get in the final scene. Speed Tree's freehand feature also includes a trimming tool that works much like real life pruning. It's intuitive and surprisingly fun to use. Tools like these are part of the reason I really enjoy working with Speed Tree.
After trimming, I apply textures to the trunk using SpeedTree's built-in library, which offers a variety of bark types.
Next comes the wind setup, which is one of SpeedTree's standout features. You have full control over how the wind affects different parts of the tree. For example, you can set the trunk to sway gently while the smaller branches and leaves move more dramatically. This creates a much more natural and dynamic feel.
You can also add turbulence to simulate gusts and uneven wind patterns, giving the tree a more lifelike and cinematic motion. The tree is nearly there. It just needs a few final adjustments. I'll add a slight curve to the trunk to make it feel more organic. And apply some displacement to the trunk and branches to give the surface more natural variation.
After those shape tweaks, I'll generate the roots. SpeedTree has built-in support for root creation, which makes this step quick and easy. With everything in place, the model is now ready for export.
Now it's time to bring everything into Blender. First export the tree from SpeedTree, including the wind animation data. Then we'll import it into Blender and load the wind animation. First, let's export the tree from SpeedTree. Once everything is set up, you're ready to export your tree. Make sure to enable wind animation in the export settings and choose the appropriate frame rate and animation duration. Export the mesh as an FBX file which Blender can read. The wind animation itself will be saved as a PC2 cache file. This cache file can become quite large, especially if your tree has a high poly count or the animation is long. So, be mindful of your settings. Now we'll import it into Blender. In a new Blender scene, start by importing the FBX file.
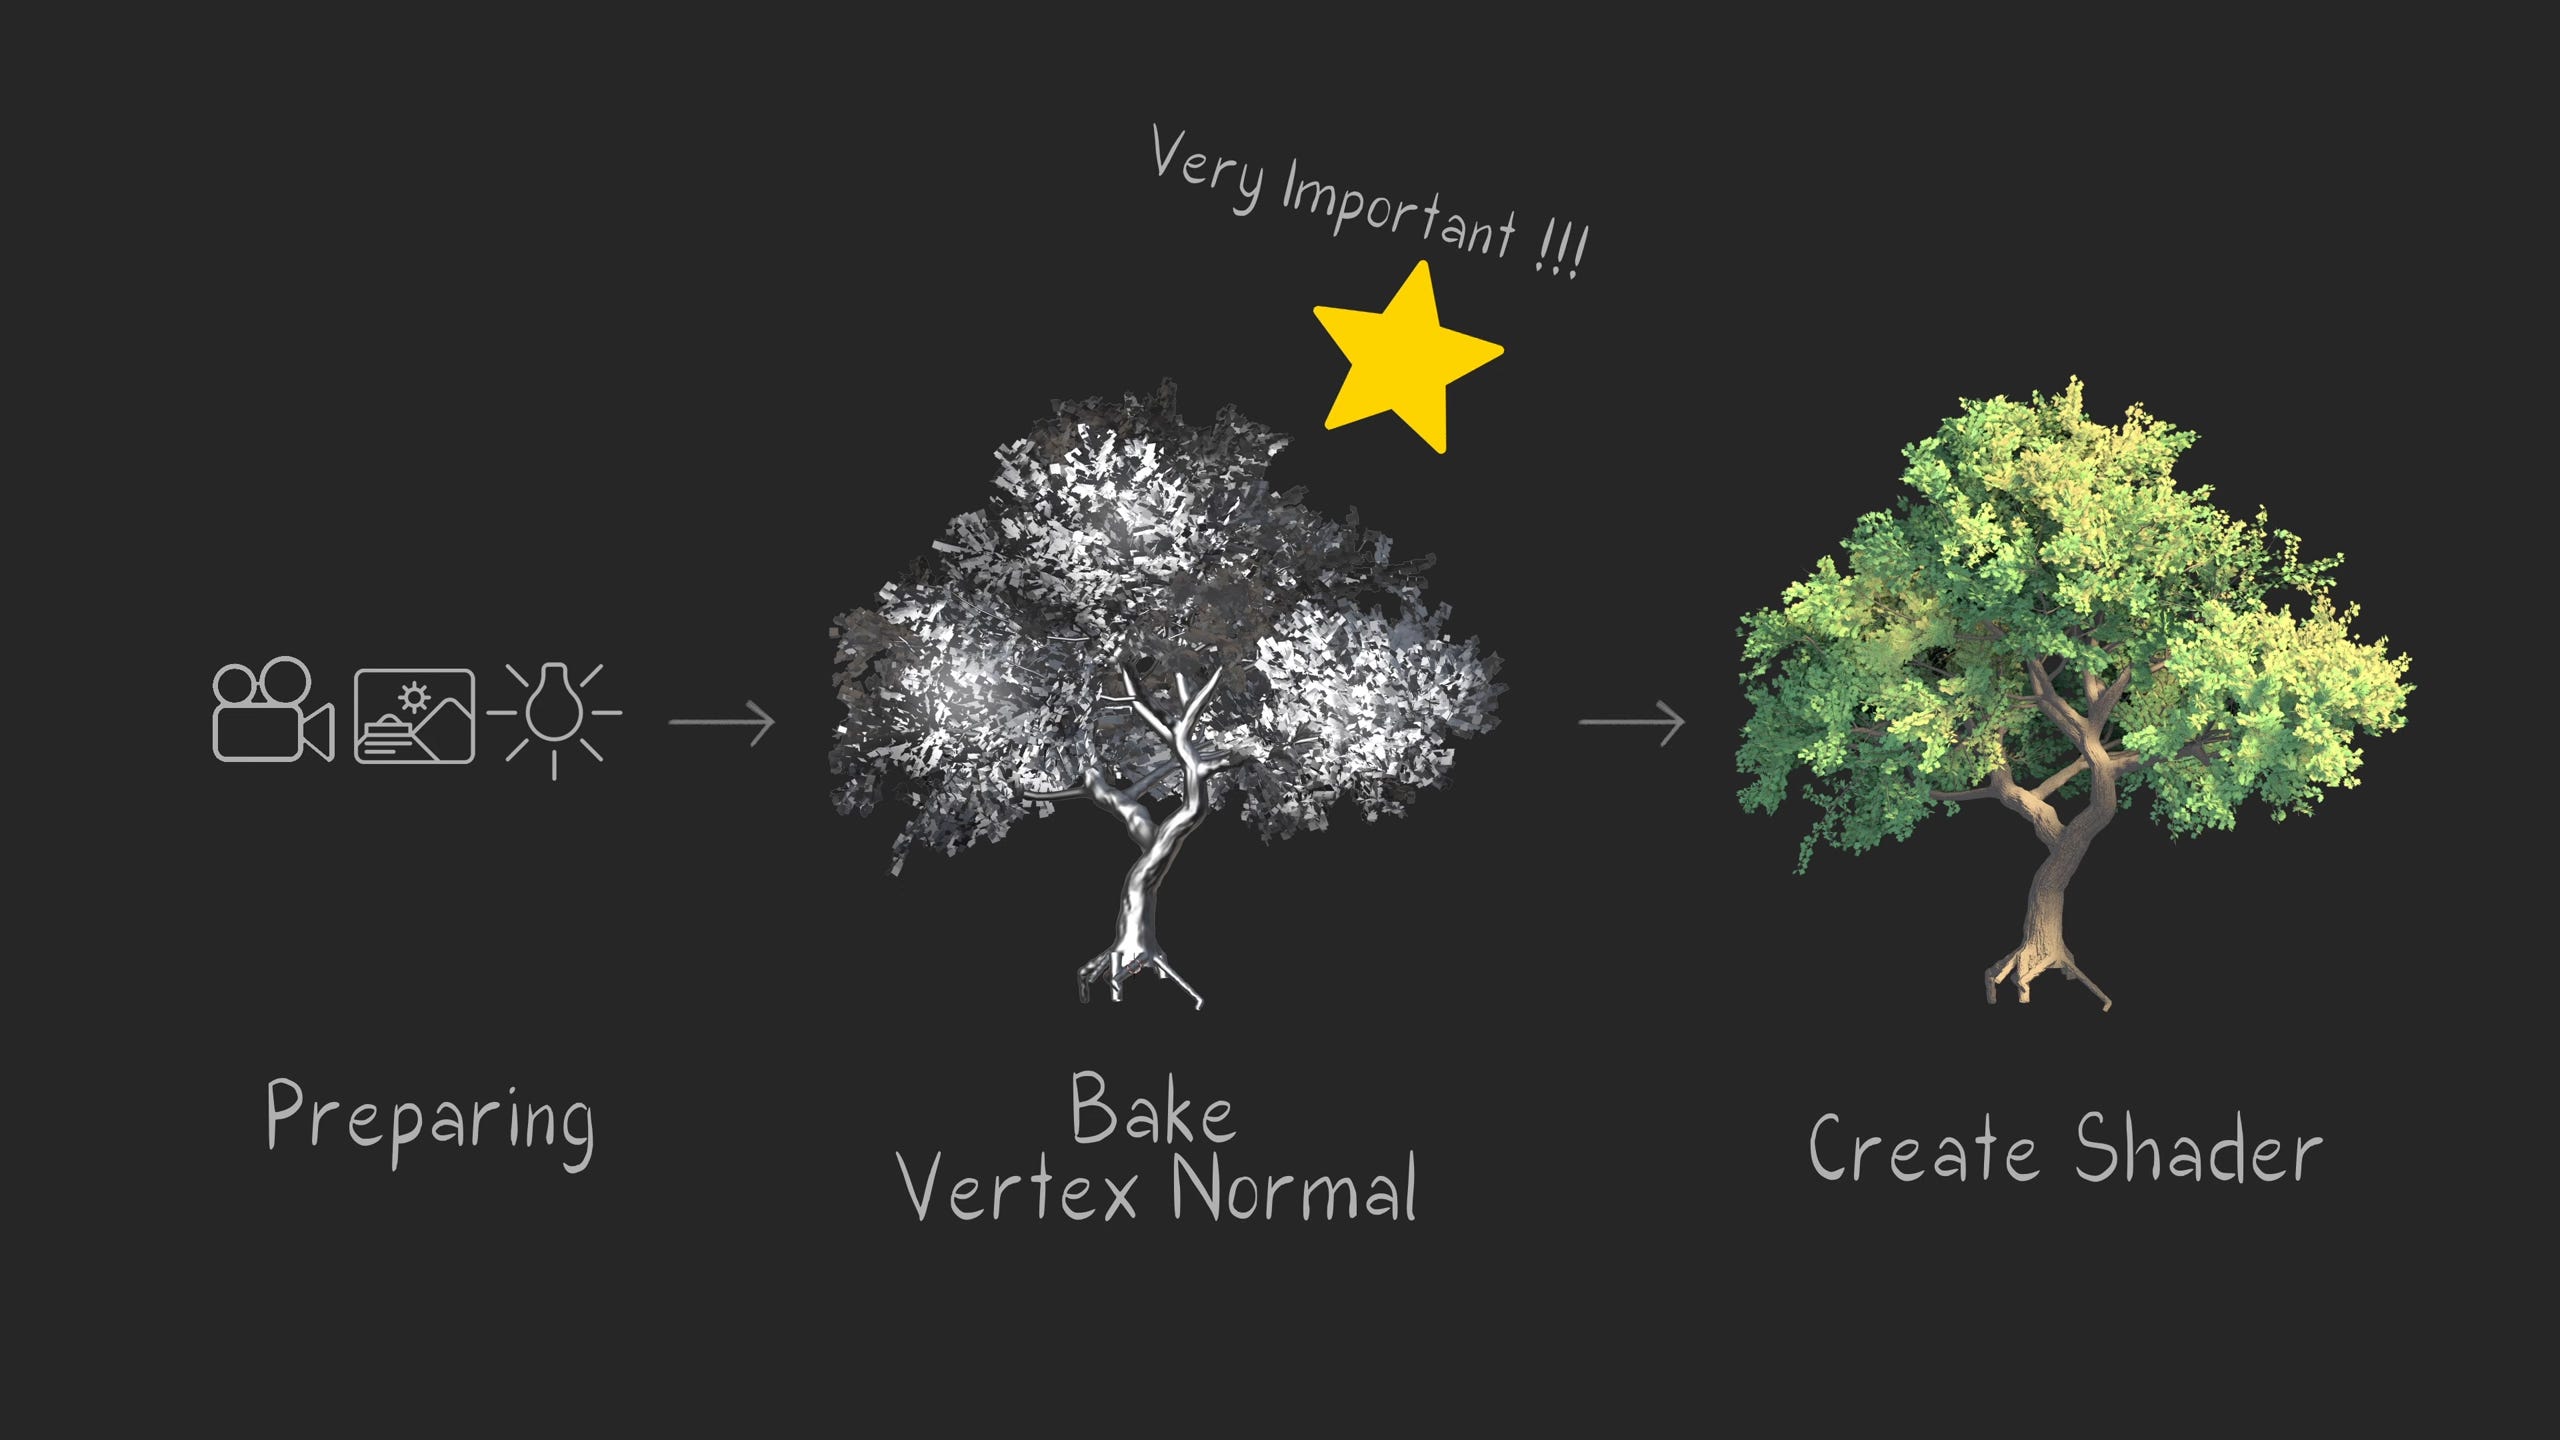
Then for each part of the tree, add a mesh cache modifier and load the animation using the PC2 format. You'll need to apply this to every individual geometry piece. Even with the animation, the mesh stays relatively lightweight. One great thing about SpeedTree's wind system is that the animation is loopable, something that's rare and incredibly useful. With that setup, we can now move on to lighting and shader setup. Let's talk briefly about what we'll do in this stage. First, we'll do some preparing for the scene, camera, background, and lighting. Then we'll bake vertex normal to better enhance the shading of the foliage. This is very important. Lastly, create a shader setup specifically for anime style tree. We'll now do some preparing for the scene. First, I'll remove all the default materials that come with speed tree and assign new ones so I can start fresh with the shading setup.
I'll also set up the camera with a narrow field of view to mimic a zoom lens, which helps create that anime style look.
For the background, I'll use a simple flat plane with a static 2D image since the focus is on the animated tree. By keeping background elements static and only animating the tree in 3D, the workload stays manageable.
I'll add a sunlight here. Lighting direction plays a big role in the final look. It influences how soft or sharp the highlights appear. For a more cinematic feel, it's usually best to have the light cast across the frame from one side to the other. In the shader editor, I plug the background image into the emission slot of the shader and set the base color to black so the emission displays properly. Finally, I fine-tune the camera angle and rotate the tree to find the most appealing composition. Next, we'll bake the vertex normal. To enhance the shading, I start by creating a few spheres that will act as helper objects for normal baking. A technique commonly used in anime style 3D characters. These helper spheres are key to achieving clean, readable shapes in stylized foliage.
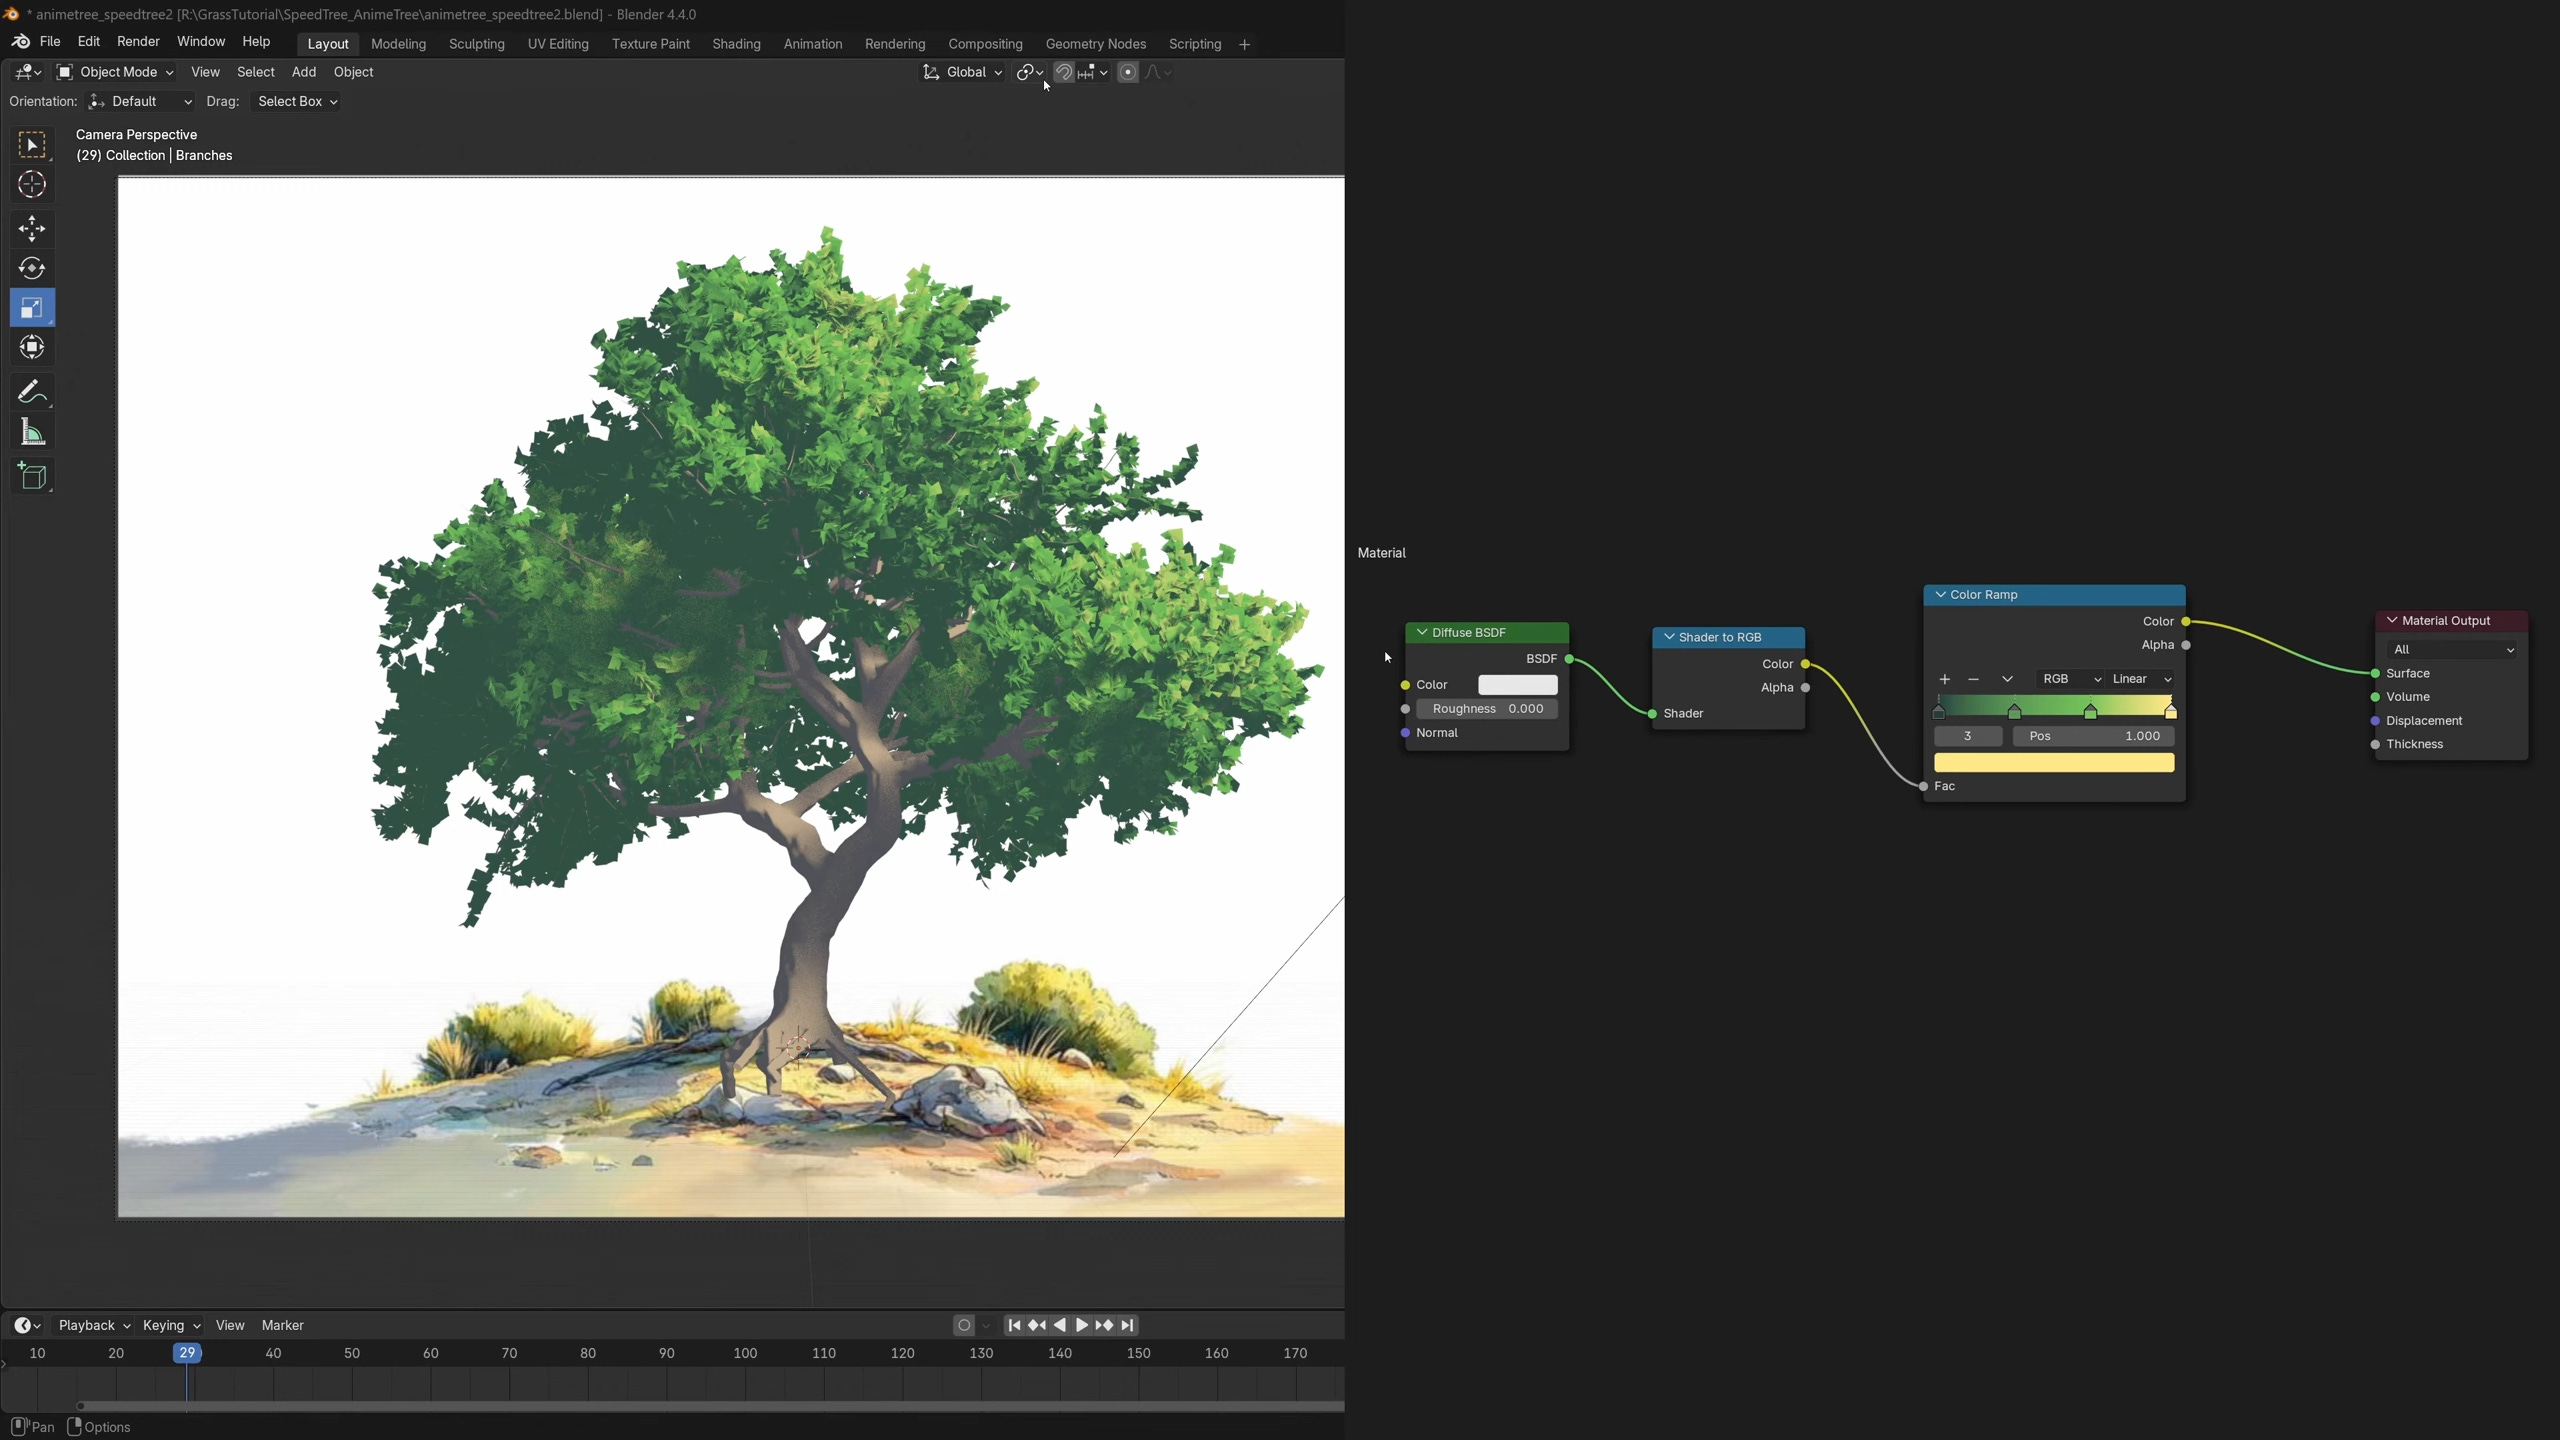
I combine them into a single mesh, then use a data transfer modifier on the foliage to copy the normals from the spheres onto the leaves. This gives the tree clearer form definition and helps reduce visual noise in the render. Make sure the data transfer modifier is placed last in the modifier stack to avoid any baking issues. Also, be sure to keep the helper spheres in the scene. Don't delete them as they're essential for the normal transfer to function properly. Here's a comparison between the foliage before and after baking the vertex normal. As you can see, the shading becomes much more consistent. Lastly, let's create the anime shader. I'll start by opening another shader editor window and enabling viewport shading. For the shading, we'll begin with a basic cell shading setup using three core nodes. Diffuse BSDF, shader to RGB, and color ramp. This is the most common and straightforward cell shading method. Your color picking skills really come into play here. The better your palette, the better the final result. Also, don't forget to enable back face coloring in the shader settings to avoid visual glitches.
I'll then duplicate this setup for the trunk using a different color tone to help distinguish the materials.
And that forms the foundation of our shader setup. Most cell shading workflows will start with these three core nodes and build on top of them from there. Next, I add alpha transparency to the leaves using a transparent BSDF combined with a mix shader. SpeedTree conveniently provides alpha masks with its assets, so you can simply plug those in. A handy trick is to add a hue and saturation node after the color ramp. This lets you quickly tweak the colors. To finish off the shading, I add ambient occlusion for better shadow control. Using a color ramp to fine-tune the intensity and a multiply node to blend it with the existing shading setup.
I apply the same shader workflow to the trunk and branches as well. You can take things further by blending in different color tones or tweaking saturation to explore more stylistic variations. The core setup stays the same. basic cell shader nodes, ambient occlusion, and thoughtful color control. To add extra detail, I also add a normal map.
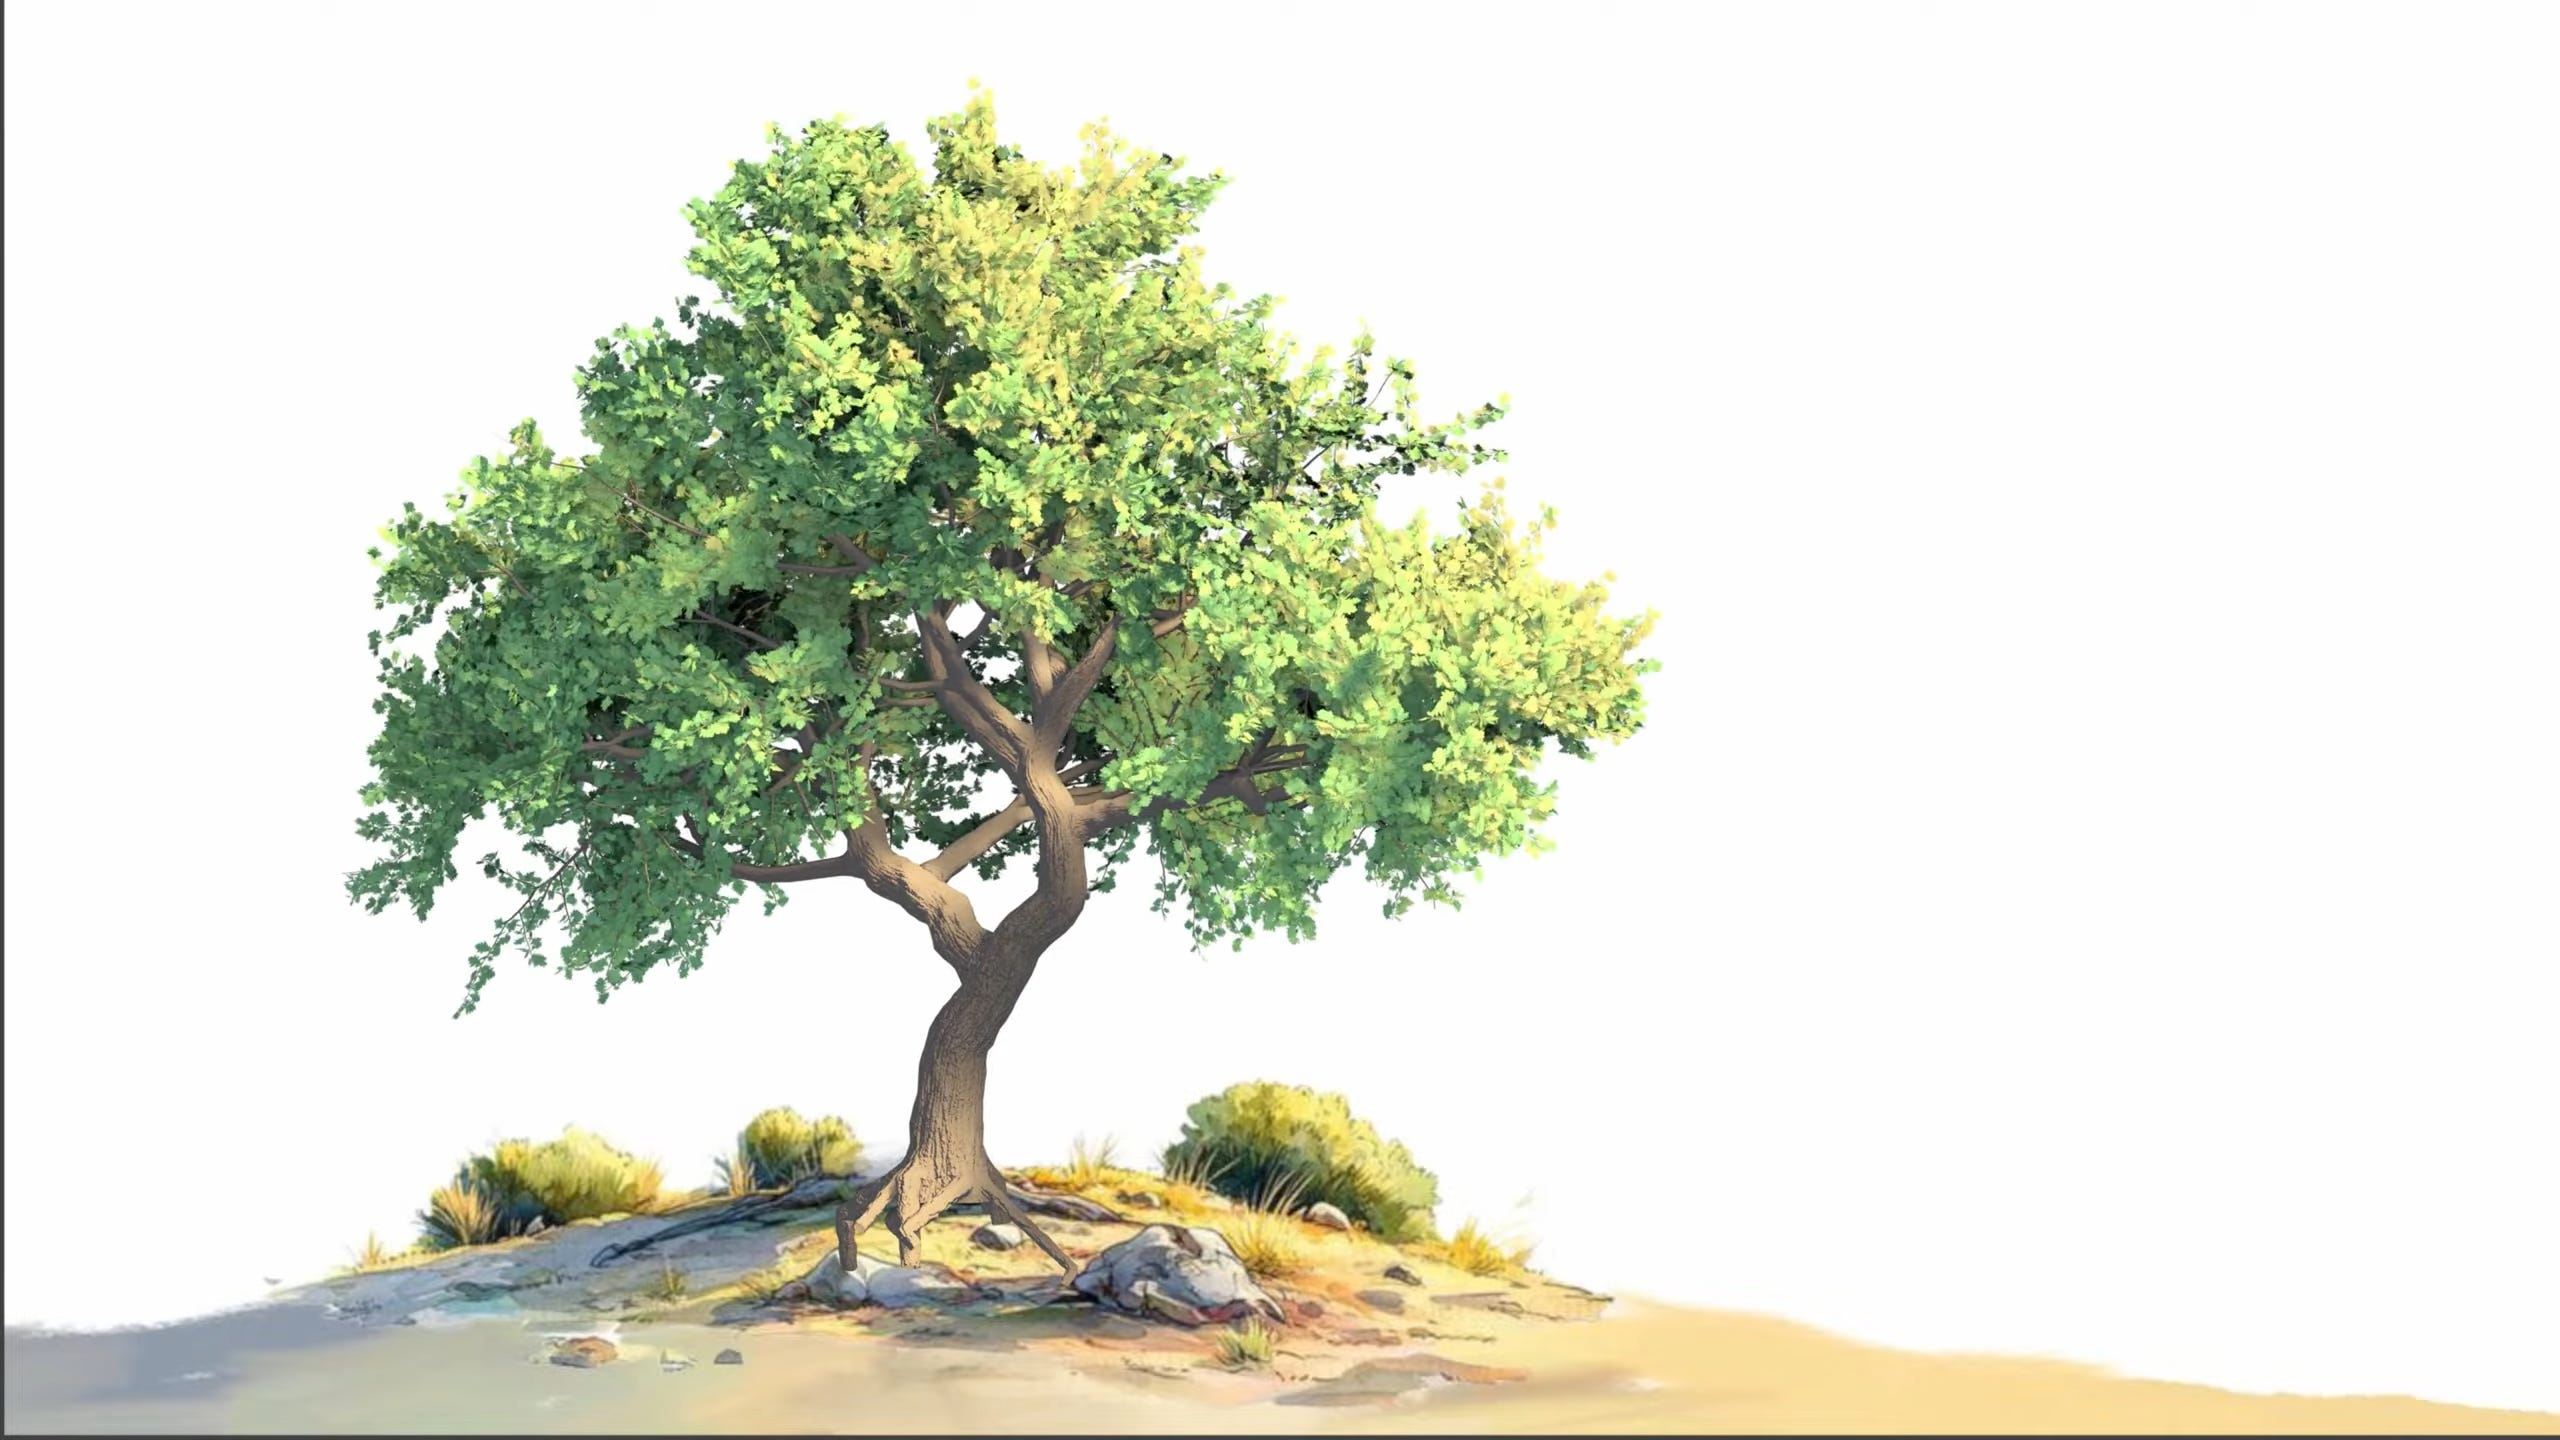
Just be sure to set its color space to non-color to ensure it displays correctly. With this setup, you now have a solid anime style tree pipeline using Speed Tree and Blender. And here's the result after all that work. What do you think?
Now, I'll show you a quick and easy method. This is actually the approach I use when working on a rushed project. The steps are simple. Pick one of Speed Tree's highquality sample trees. Make a few quick adjustments to match the look you want. import it into Blender and reuse the existing setup. First, open a sample tree in SpeedTree. Now, let's open one of SpeedTree's built-in highquality sample trees. These assets are beautifully crafted and fully set up with wind and materials. Next, customize the tree to your liking. Once loaded, you can easily adjust the shape to better fit your scene. Prune or remove unnecessary branches, reshape the canopy, and tweak the form until it matches the style you're going for, especially if you're aiming for a more stylized or anime inspired look. When you're ready, press 8 to preview the wind animation. Everything's already preconfigured, so you don't need to set up the wind manually.
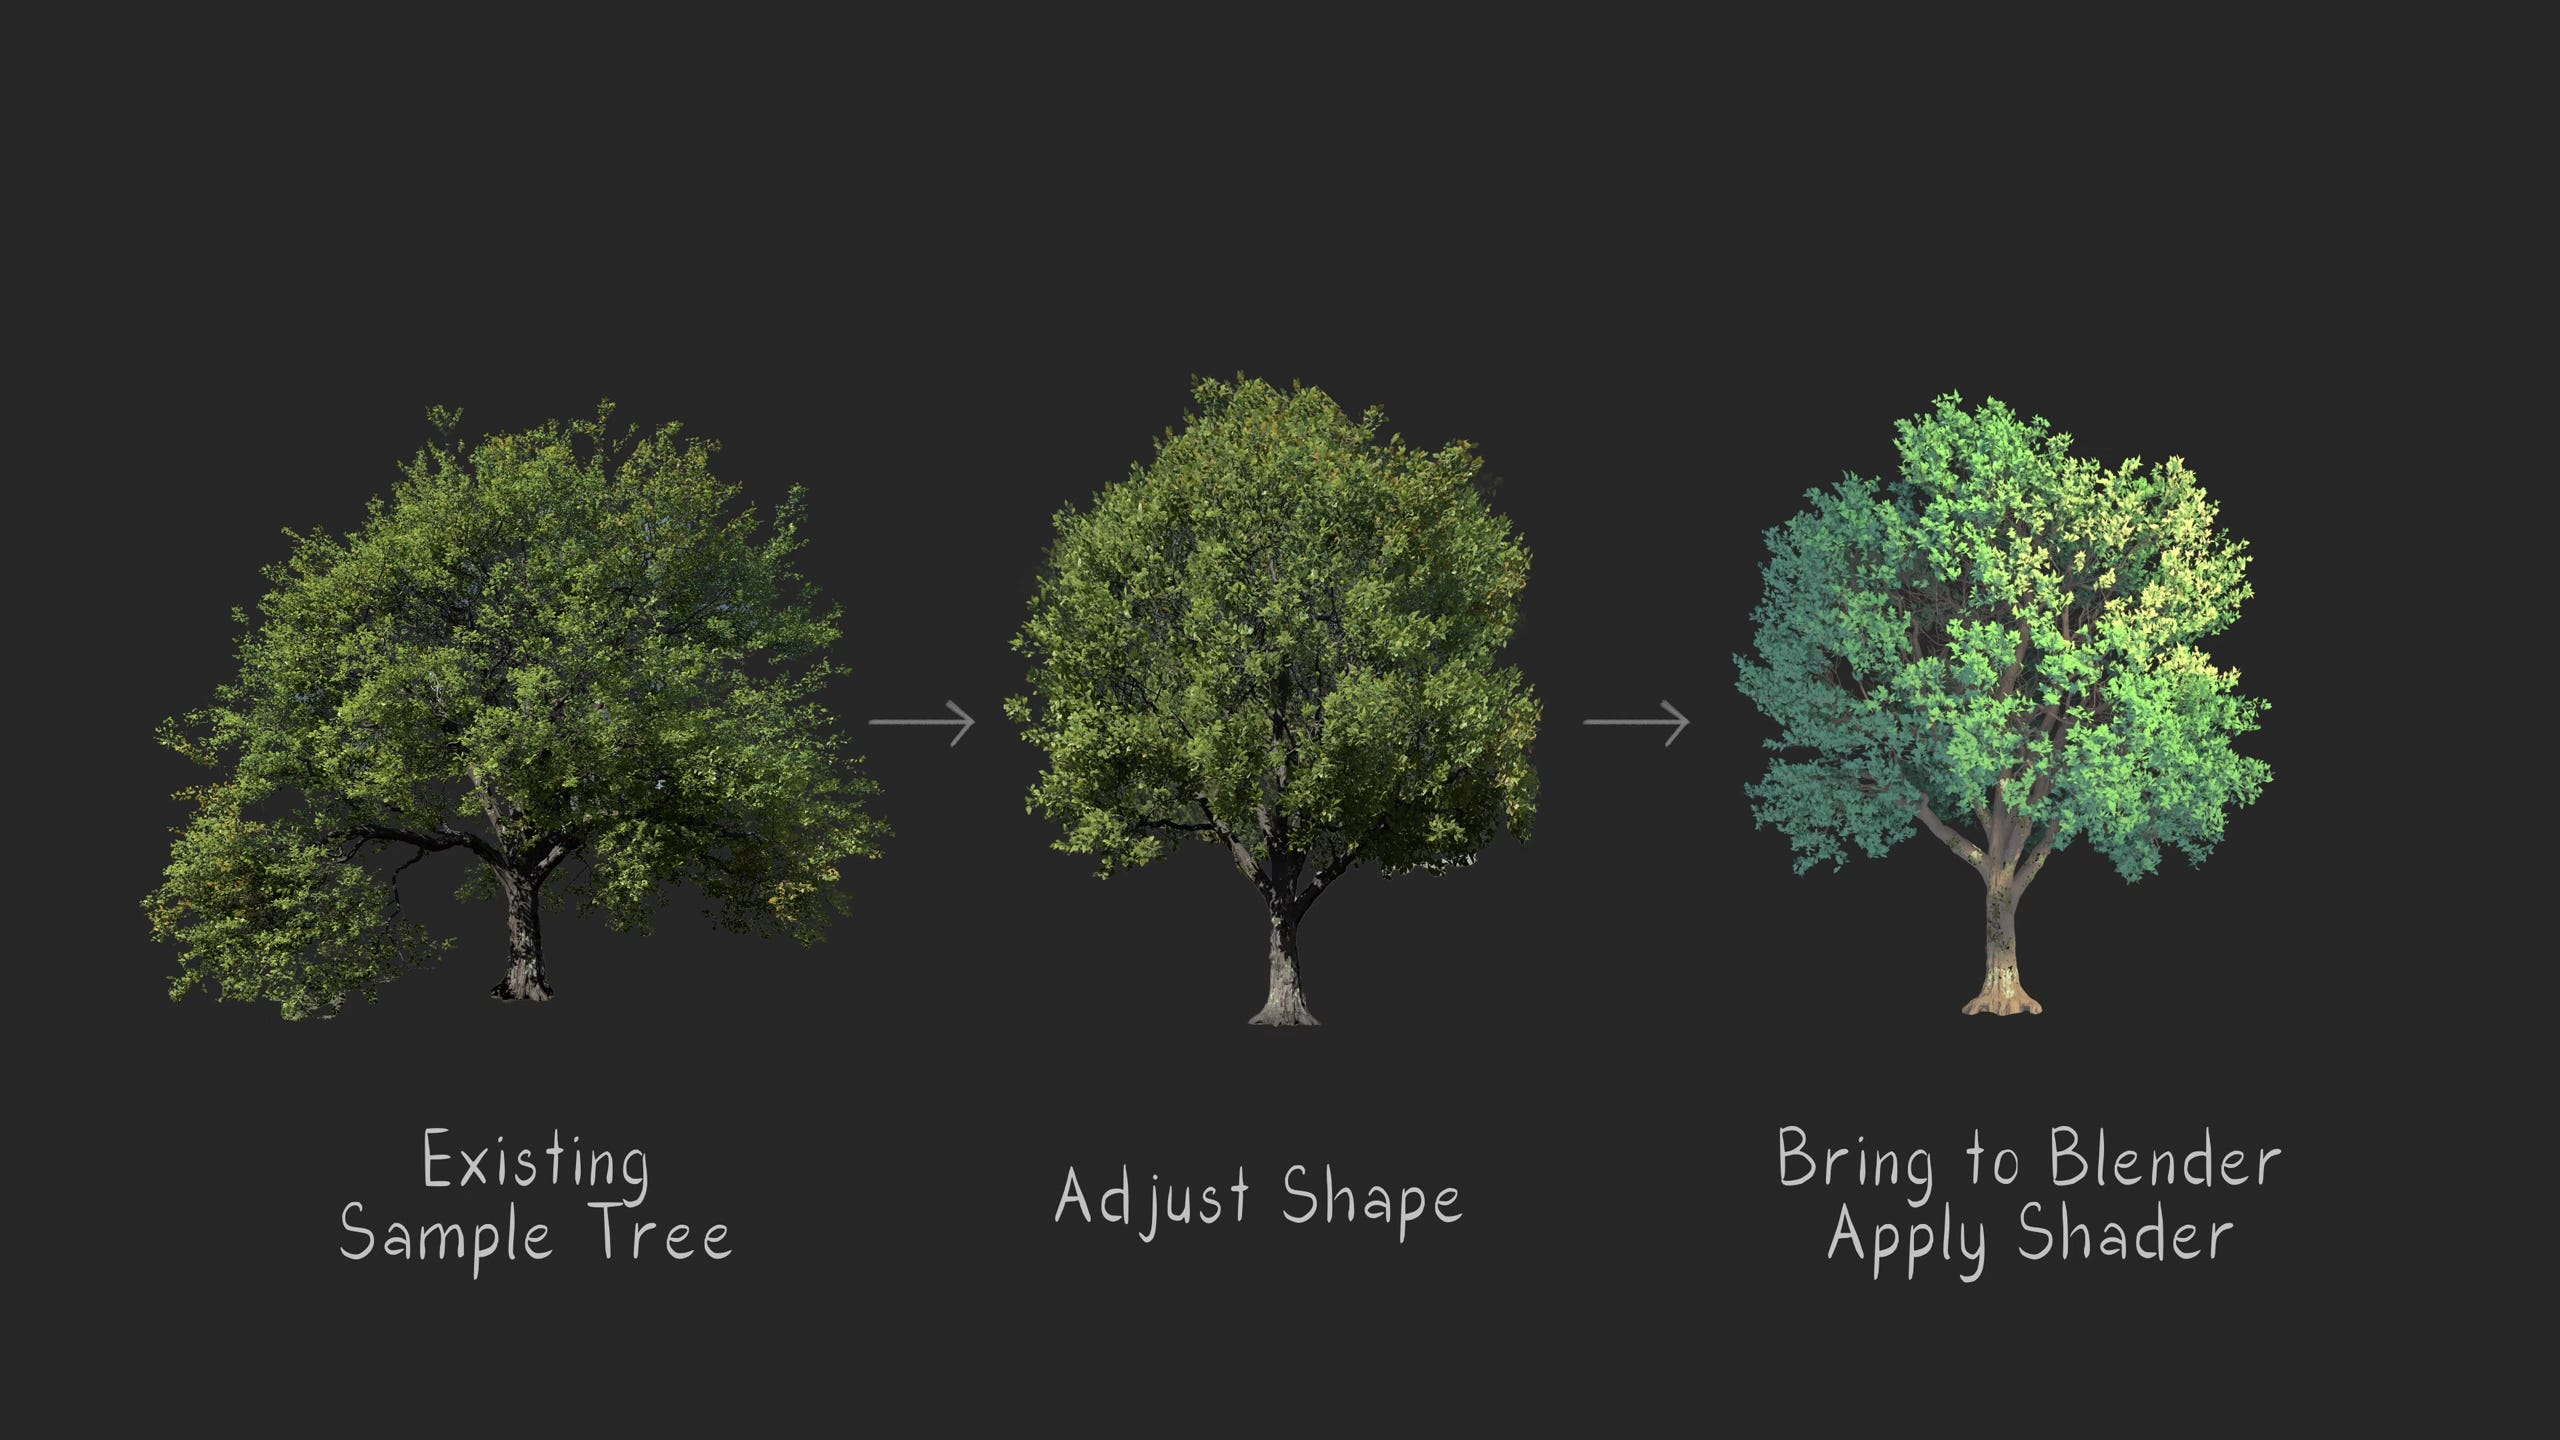
Lastly, we'll export and apply the shader in Blender. Let's export the tree using the same settings as before, including the mesh in FBX format and the wind animation as a PC2 cache file. Once that's done, bring it into Blender and apply the same cell shading setup we created earlier. Since the shader pipeline is already in place, you can simply reuse it with minimal adjustments, saving you time while still achieving a polished, stylized result. Simply copy and paste the existing shader setup and replace any elements as needed. For example, update the textures, tweak shader settings, or adjust modifier configurations. Make any additional changes along the way to match the specific look you're going for.
Once again, I'll create a simple 3D shape to bake the vertex normal. In this case, a basic round sphere is enough.
Don't forget to enable back face culling in the shader settings to avoid any visual issues. The result already looks good, so I'll just make a few small tweaks to refine the look. Next, I load in the cache file for the wind animation using the mesh cache modifier. That's it. It looks fantastic and takes almost no effort. That's why I recommend this method if you're short on time.

So, should you use SpeedTree? It depends on your needs. If your trees are far in the background or you just need a few simple assets for a game, SpeedTree might be overkill. In those cases, free or lighter tools may be more practical. But for cinematic close-ups, stylized animation, or highquality film visuals, especially where wind animation is important, Speed Tree really stands out. It offers beautiful customizable trees with natural motion that are hard to match. It's also great for creating eye-catching wallpapers or hero shots for your portfolio. Keep in mind, SpeedTree isn't free. The standard subscription starts at $19 a month, which might not suit hobbyists or indie devs on a budget. Thankfully, there's a 10-day fullfeatured trial and a learning edition with unlimited access for non-commercial use. Perfect for learning or testing it out. In the end, it depends on your project. For quick or lightweight scenes, simpler tools will do. But if you're aiming for top tier quality and animation ready results, SpeedTree is a powerful option well worth considering.
I hope you found the tutorial helpful and enjoyable, keep creating and have fun with your art.